
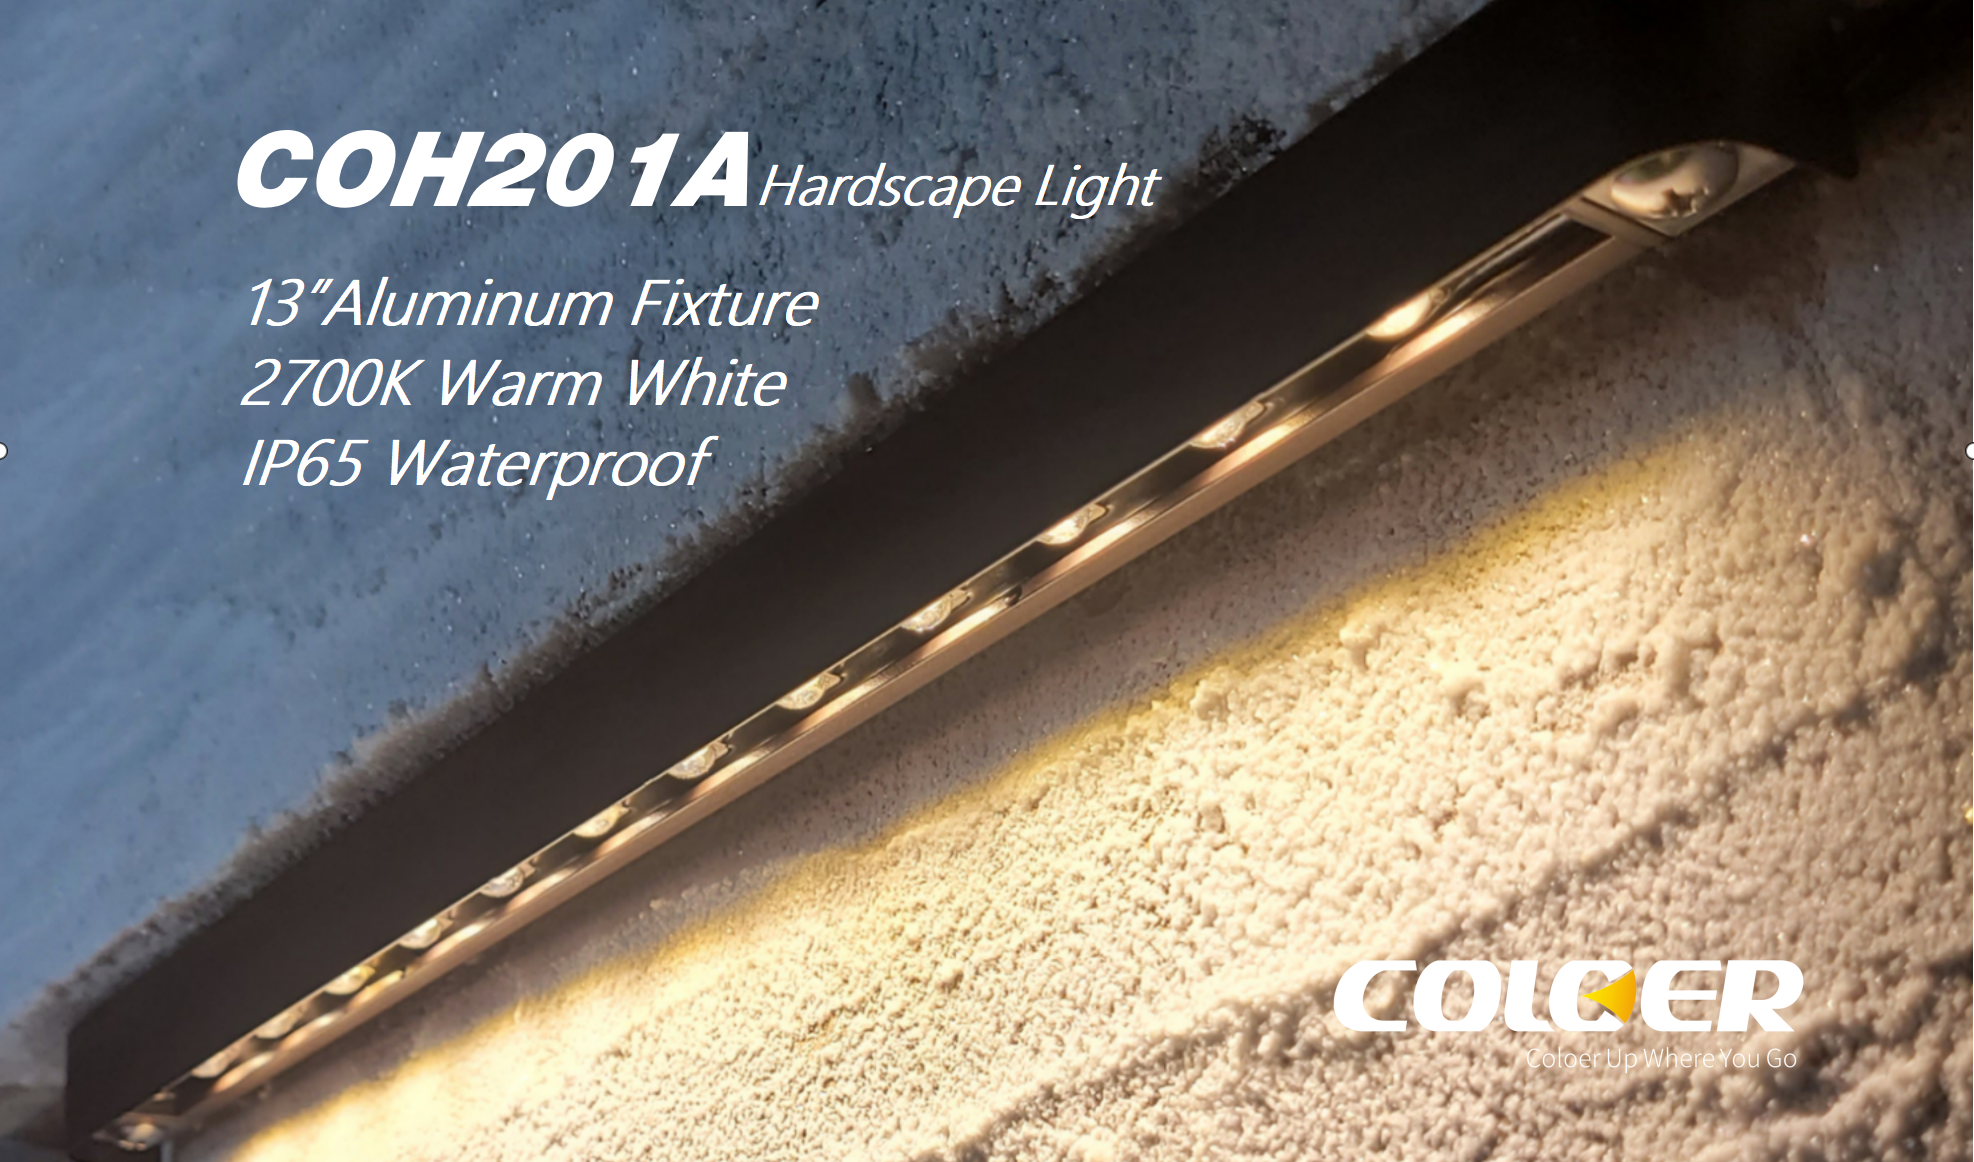
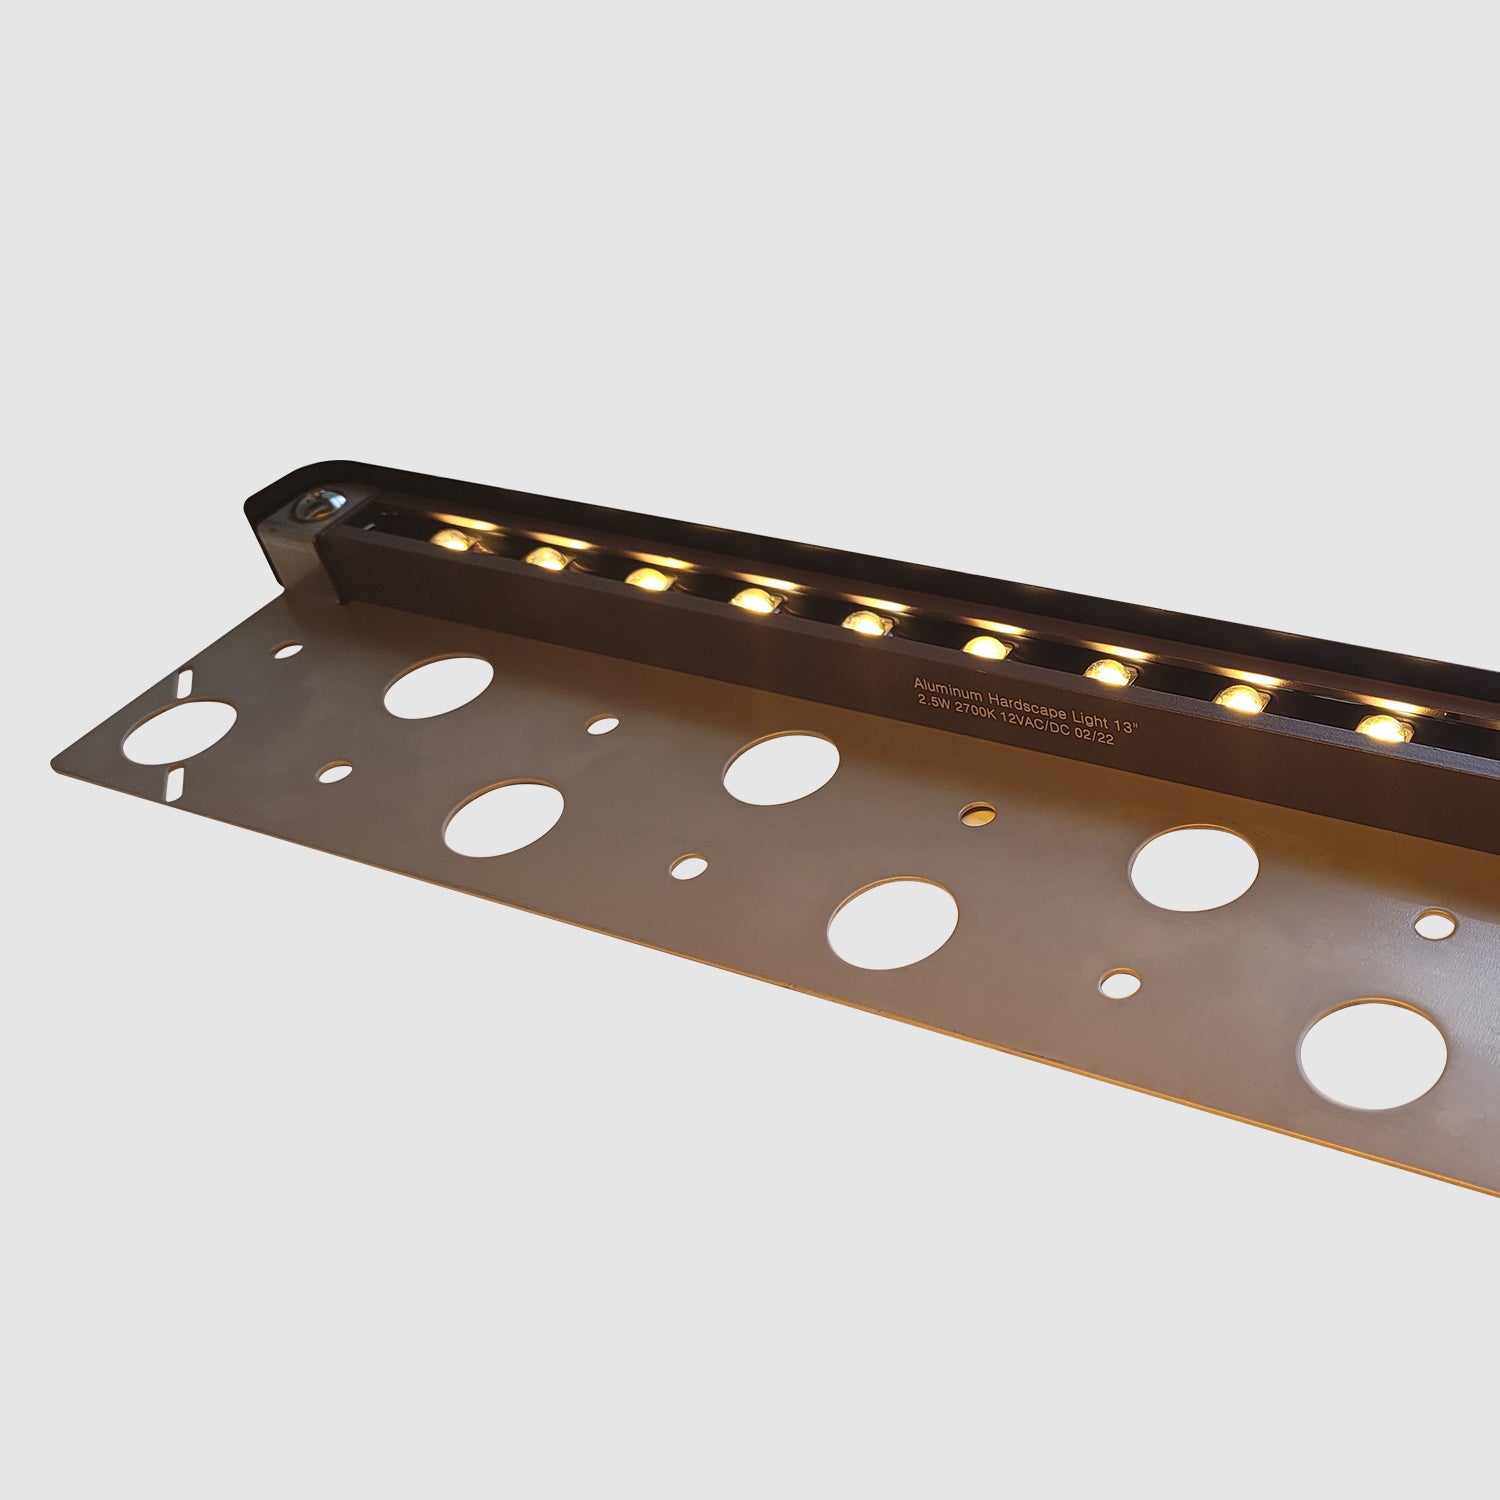
13 Inch Aluminum LED Hardscape Light,2700K Outdoor Step Lights COH201A
👉Subscribe to get $10 off on your first order!
- High-salt, moisture, and UV resist, uniform, and long-lasting finish fixture, the fine workmanship makes it tougher, harder, and aesthetically pleasing.
- With 5.74-foot 18 AWG lead wire, suitable for variety of installation requirements.
- Emitting 240lm of 2700K soft white light, this LED hardscape light only needs 2.5W to match the output of a 10W incandescent light. The 45⁰ downward beam angle eliminates glare.
- Easy installation, just set the fixture in the slot, Stick your screws in the anchors, then screwing them down.
Description
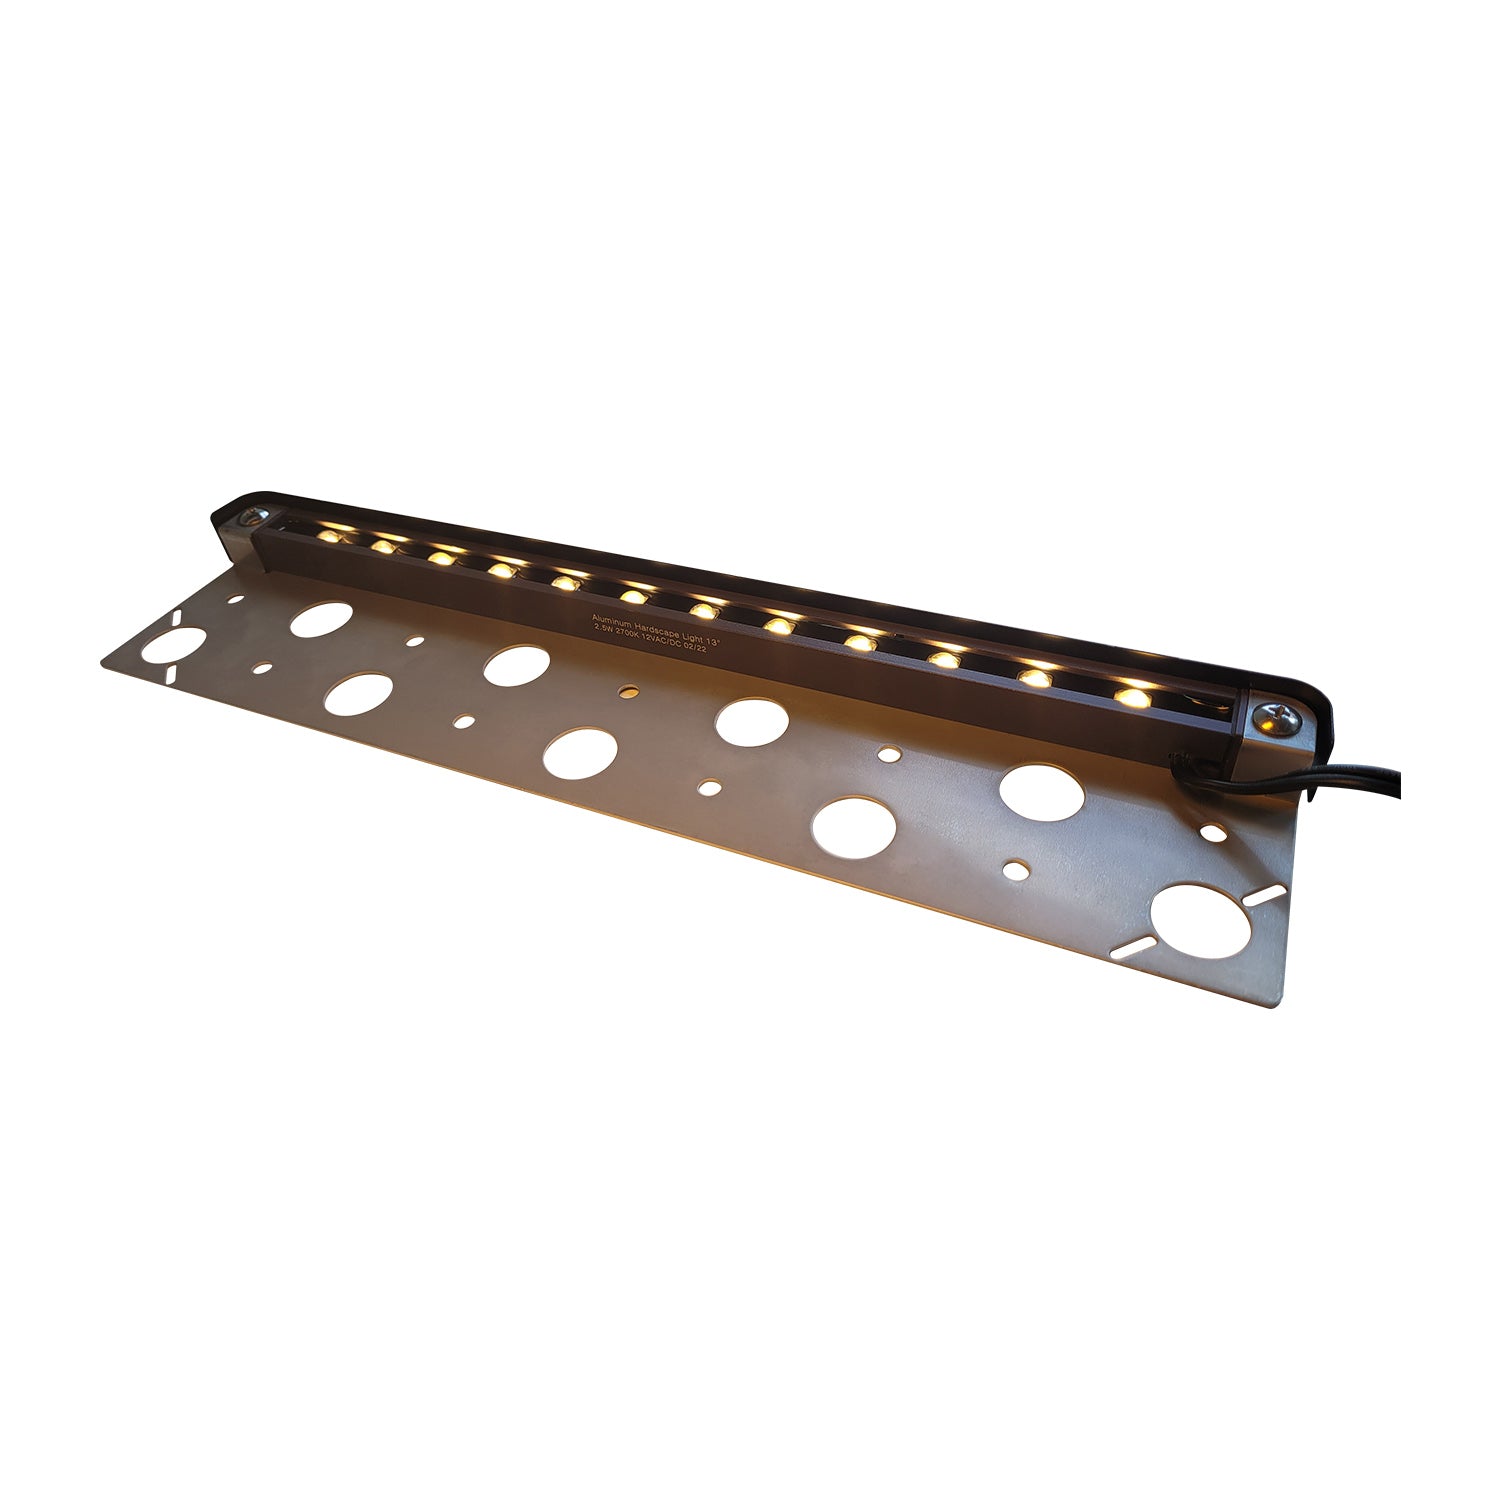
13-inch Aluminum LED Hardscape Lighting
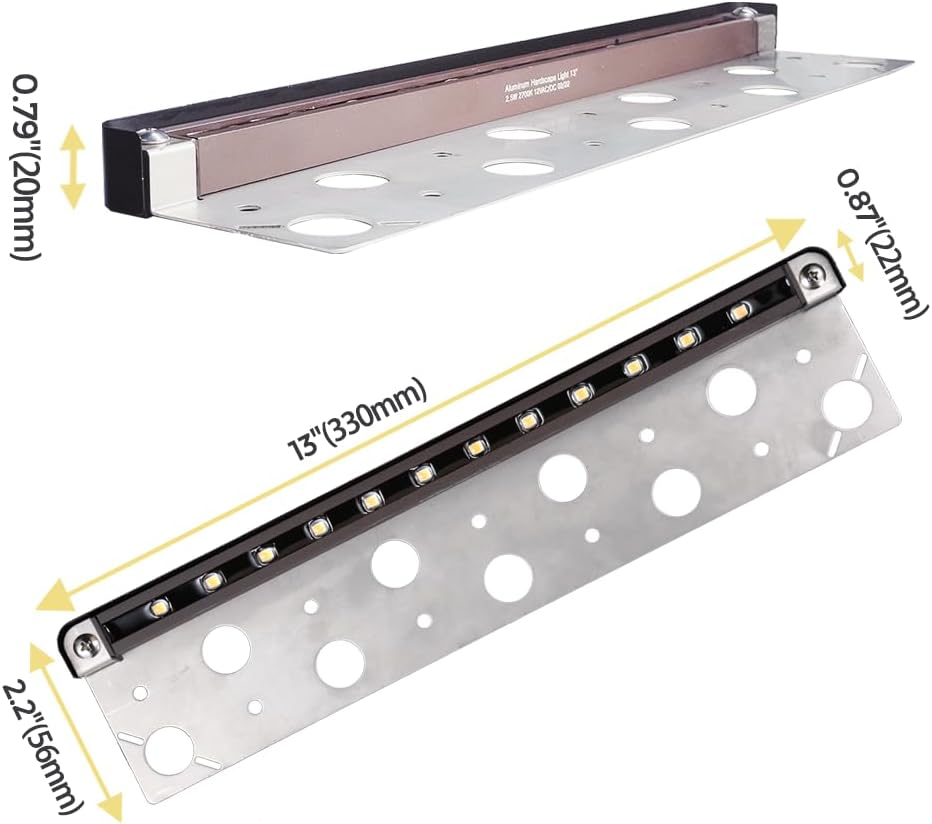
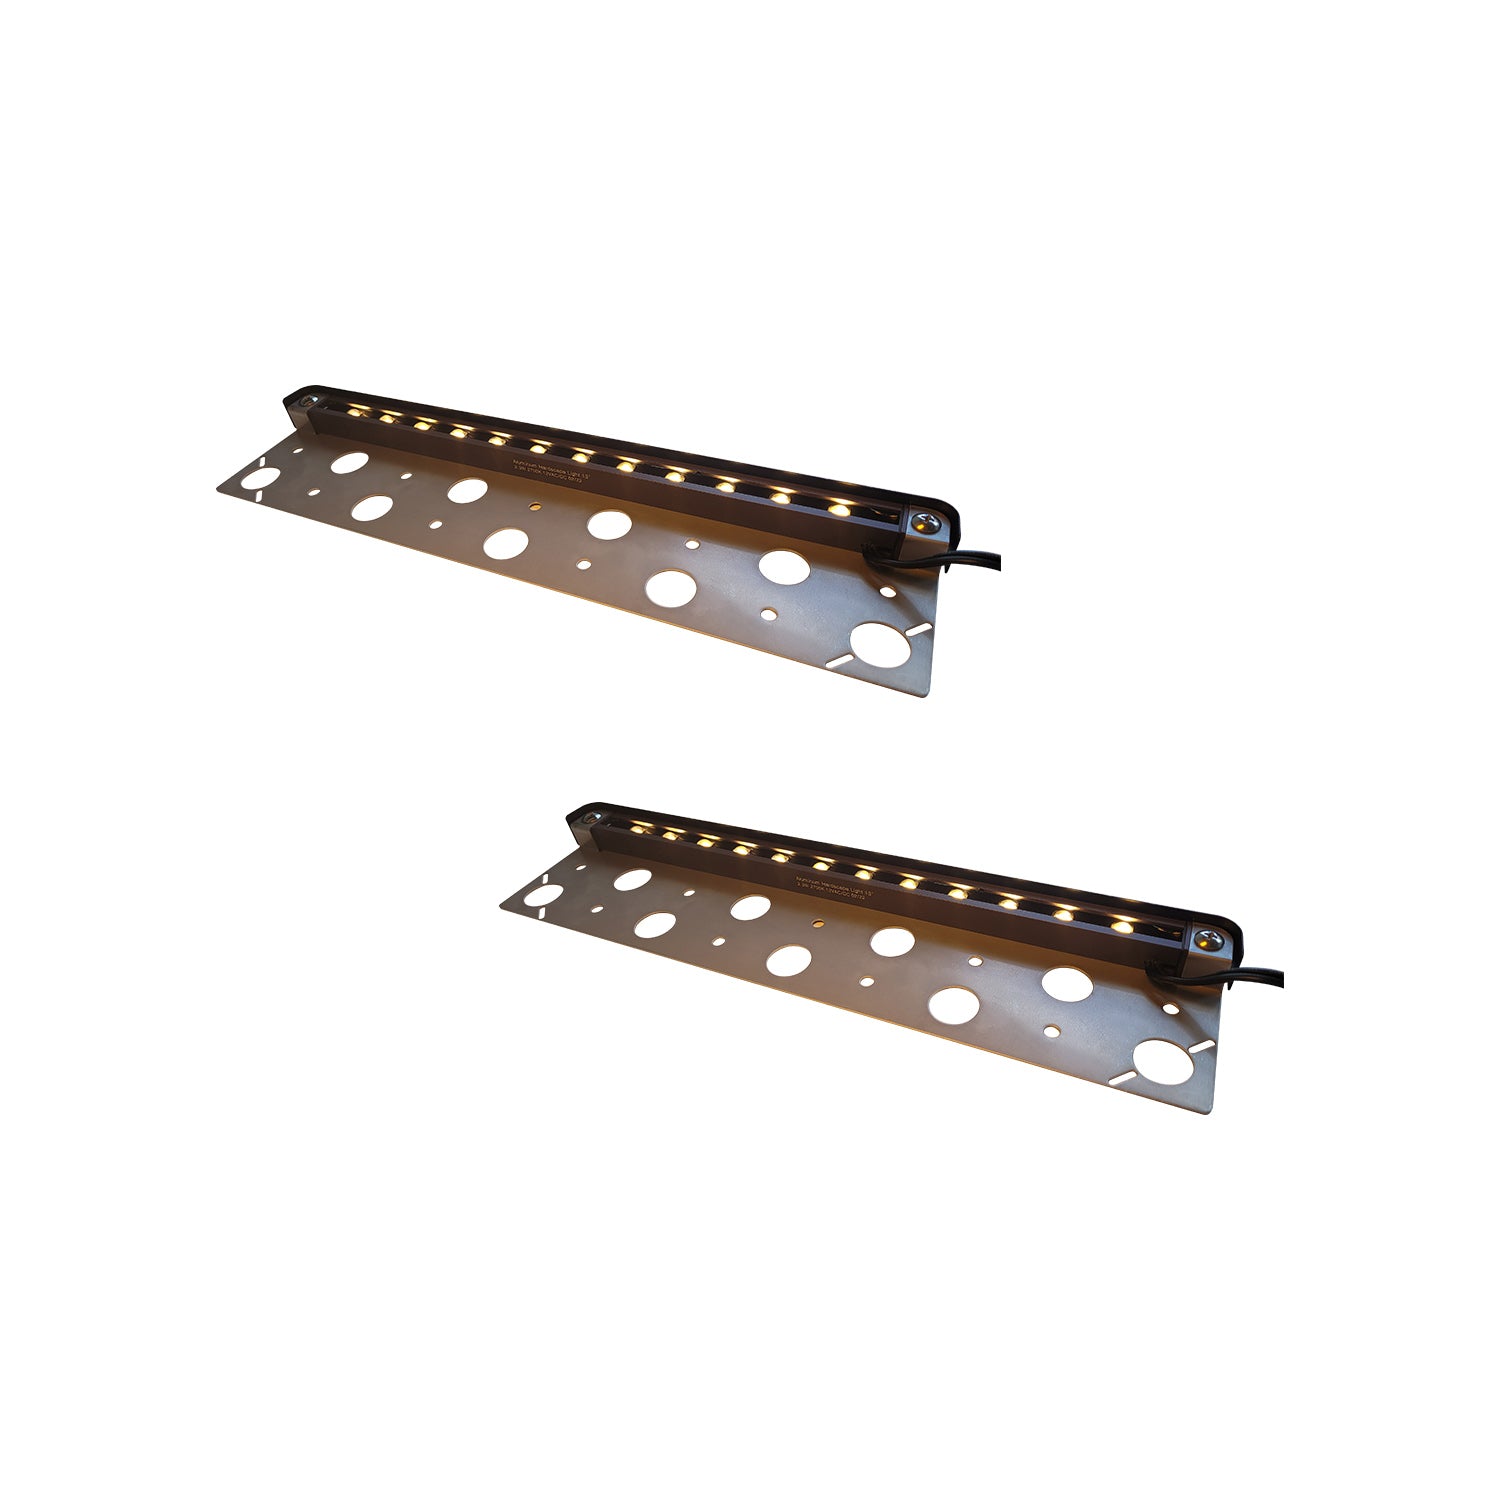
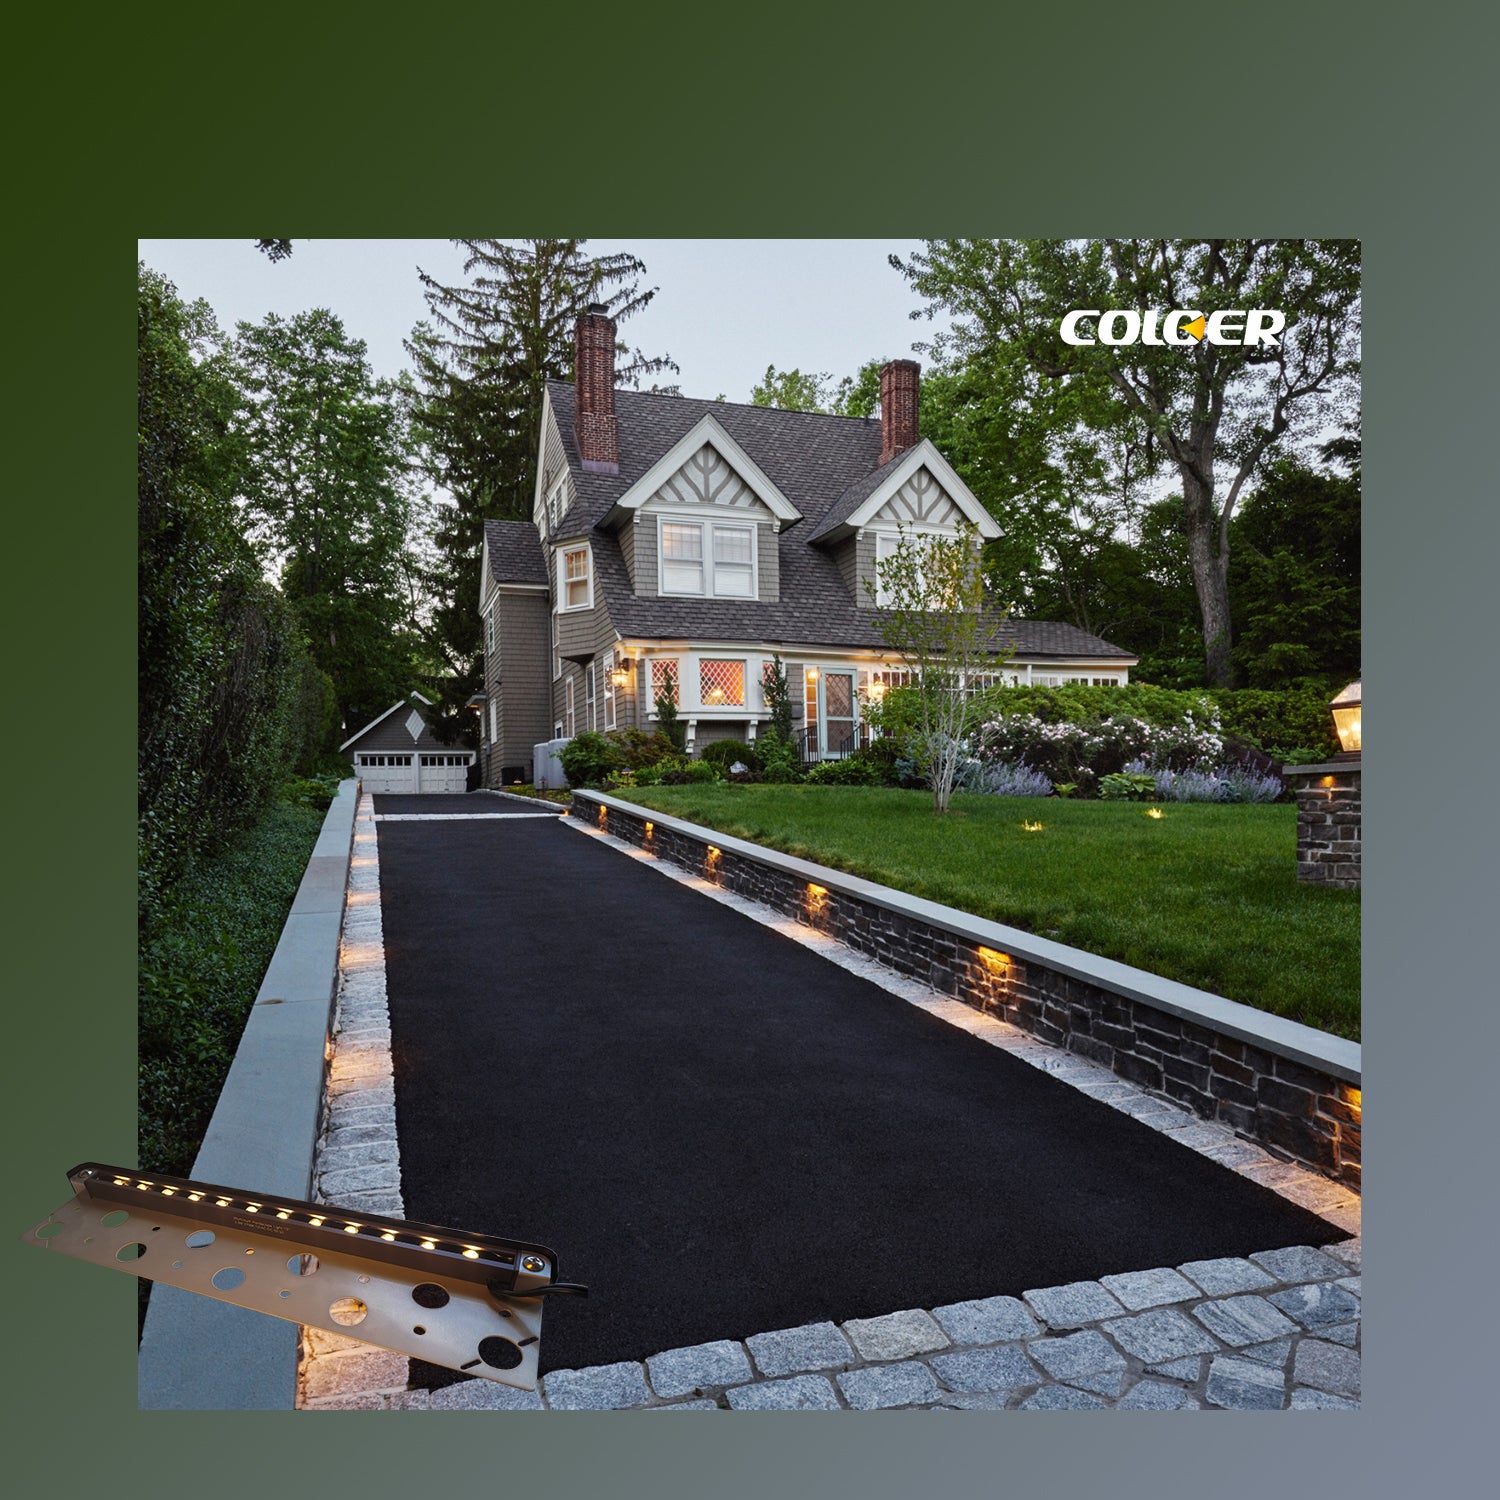
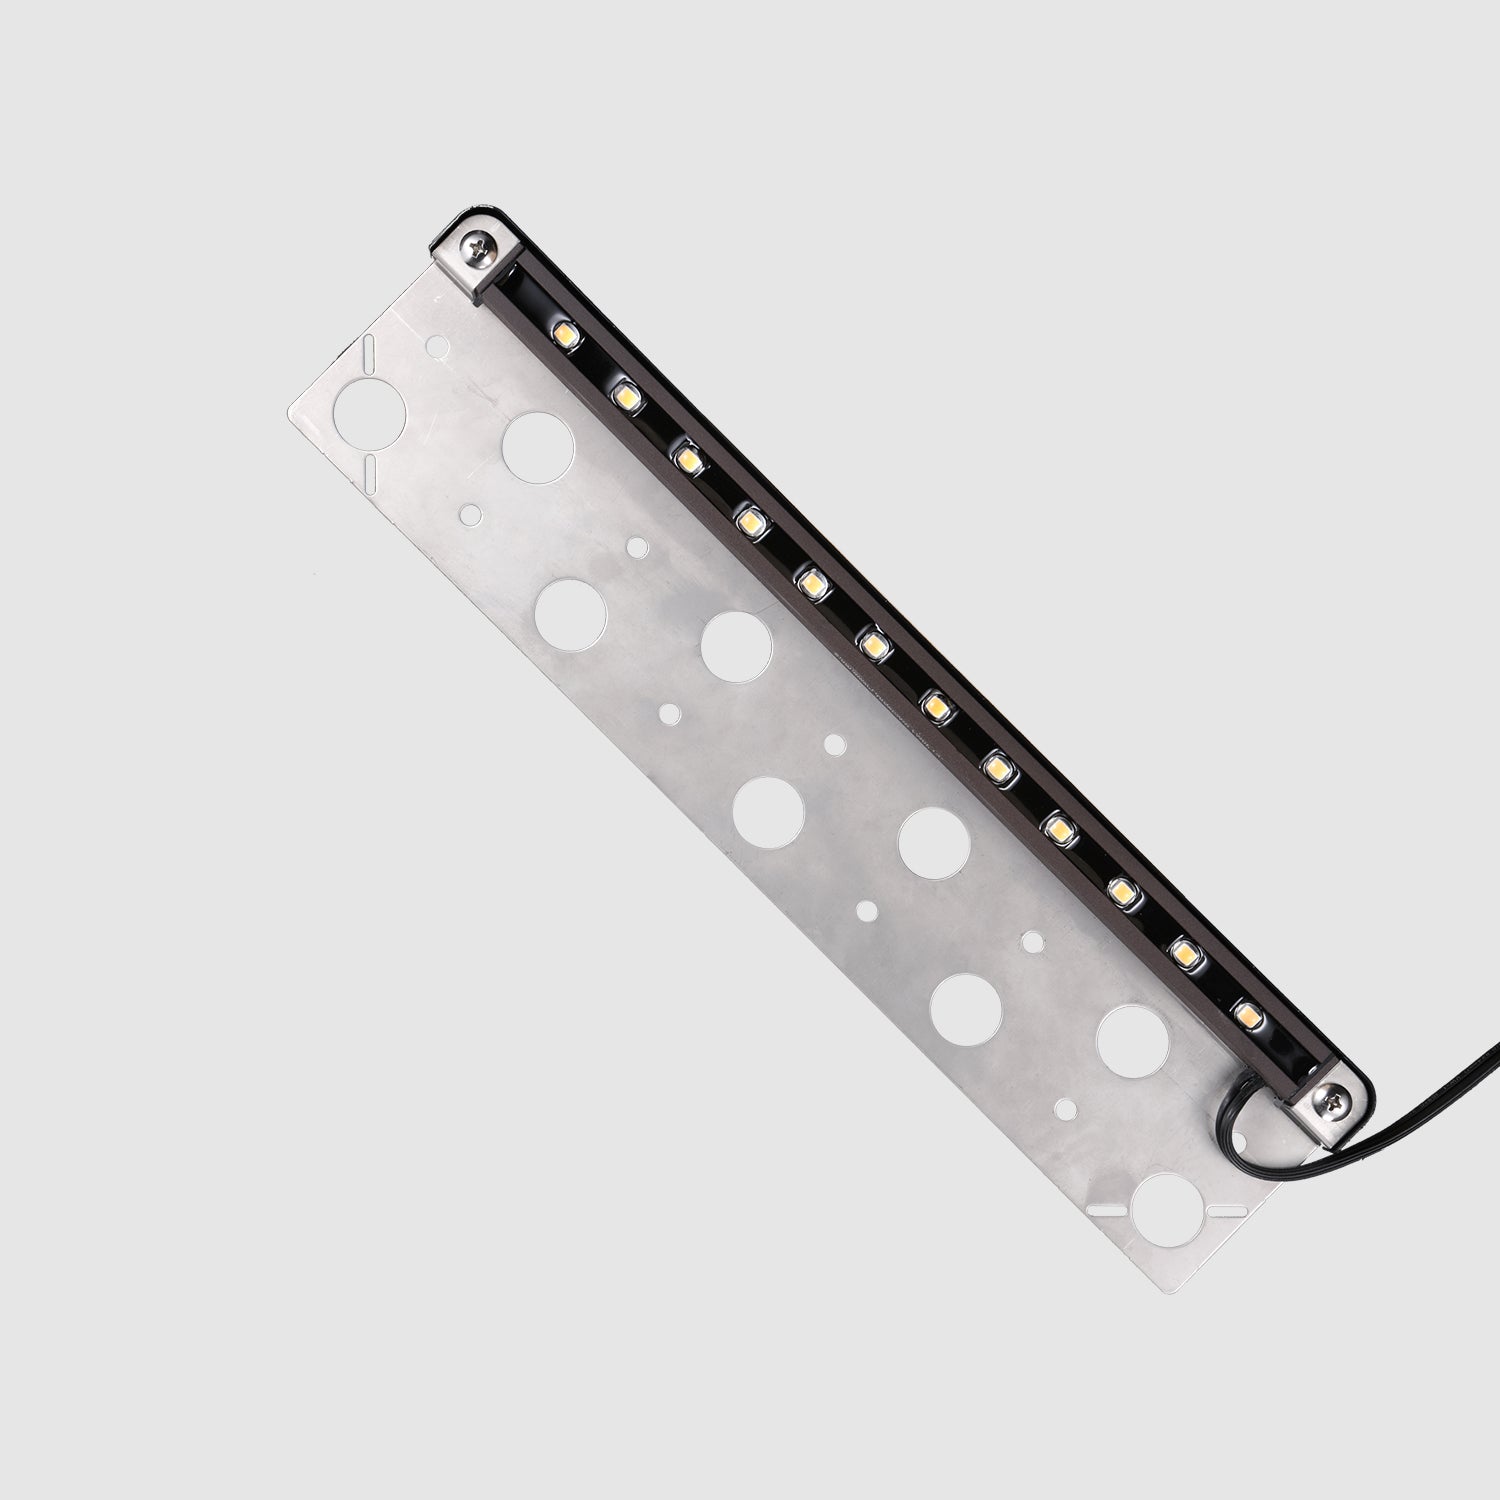
This hardscape built with aluminum for maximum resistance to the outside elements, equipped with efficient and long-lasting LEDs. The CRI of 90 displays the true color of objects. This hardscape lighting line has an aluminum shell with a 13-inch length and 3 easy-to-install mounting plates for walls, steps, and ceiling installations.
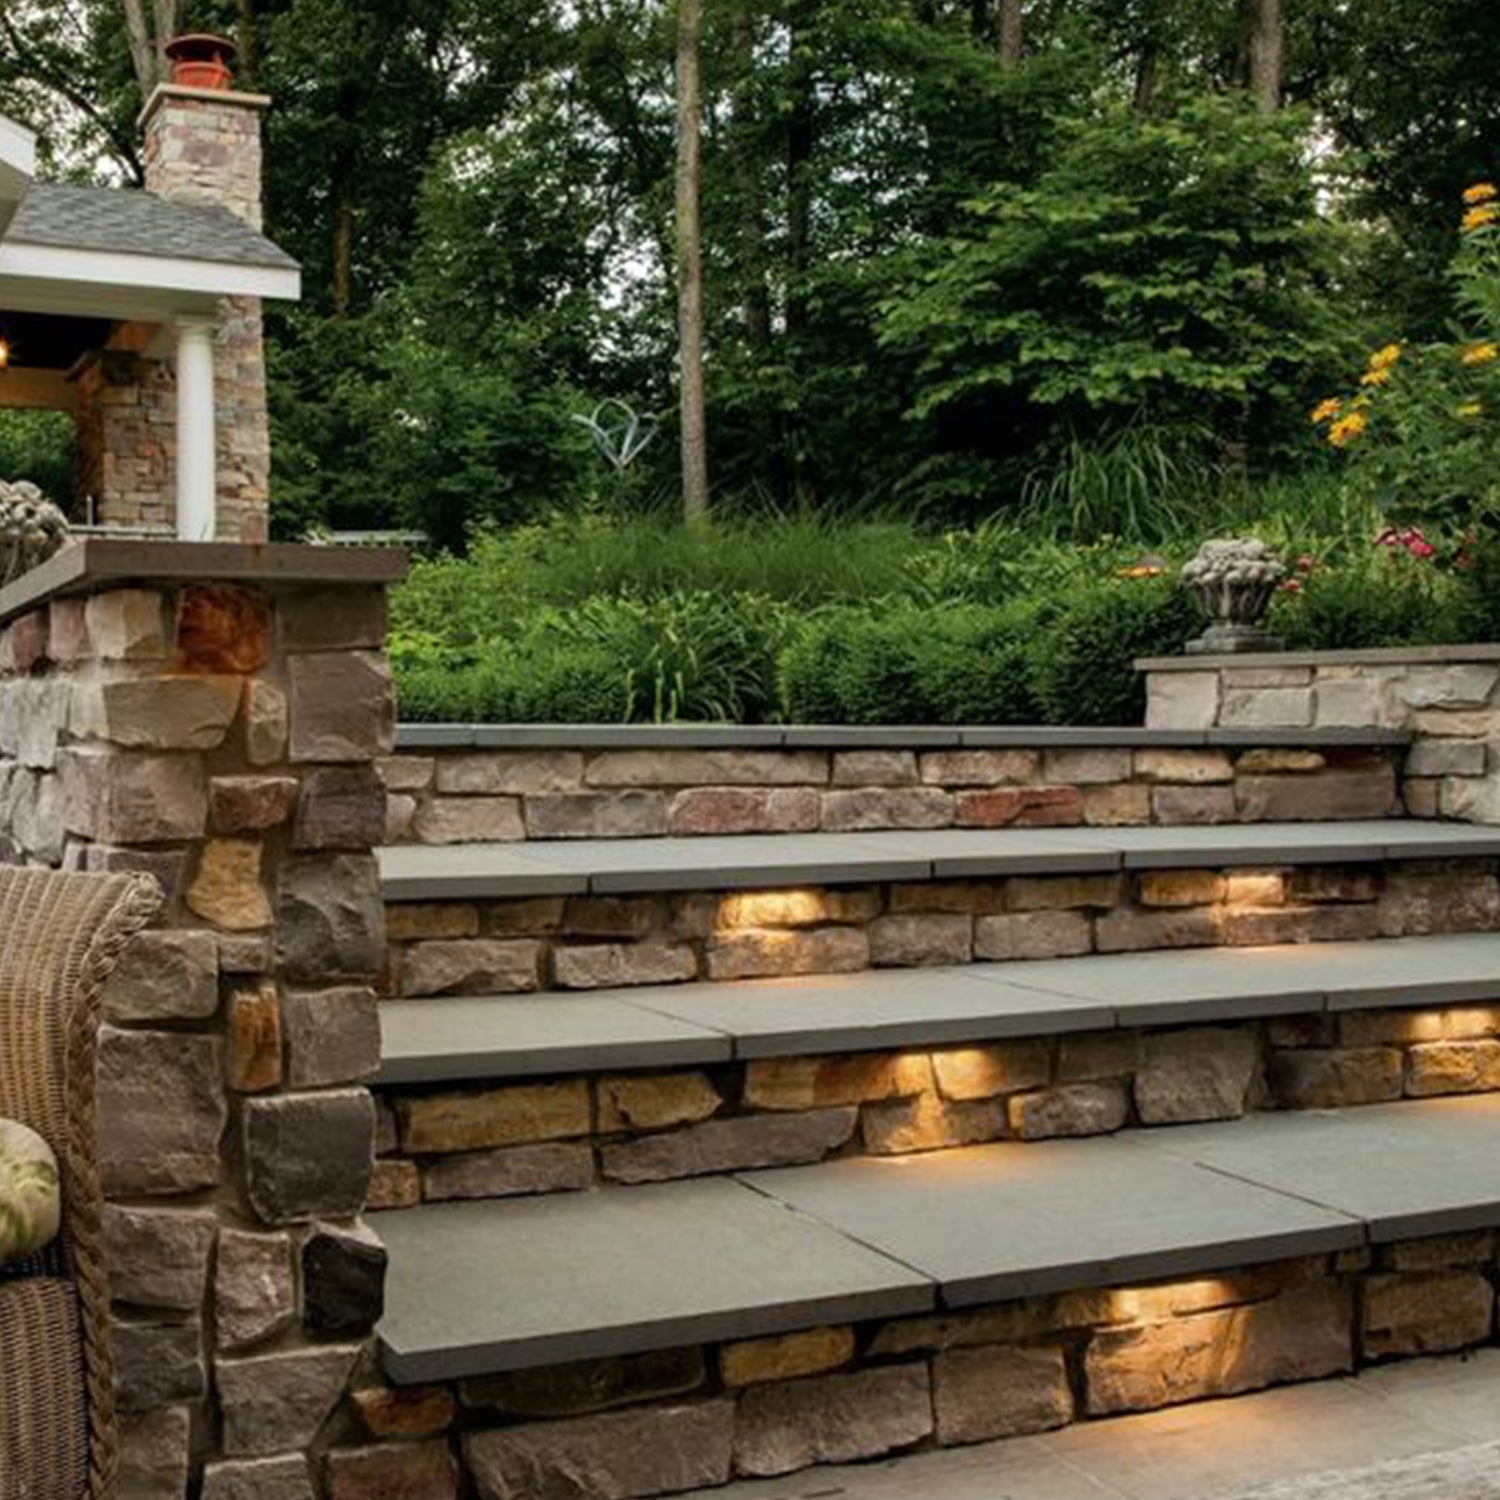
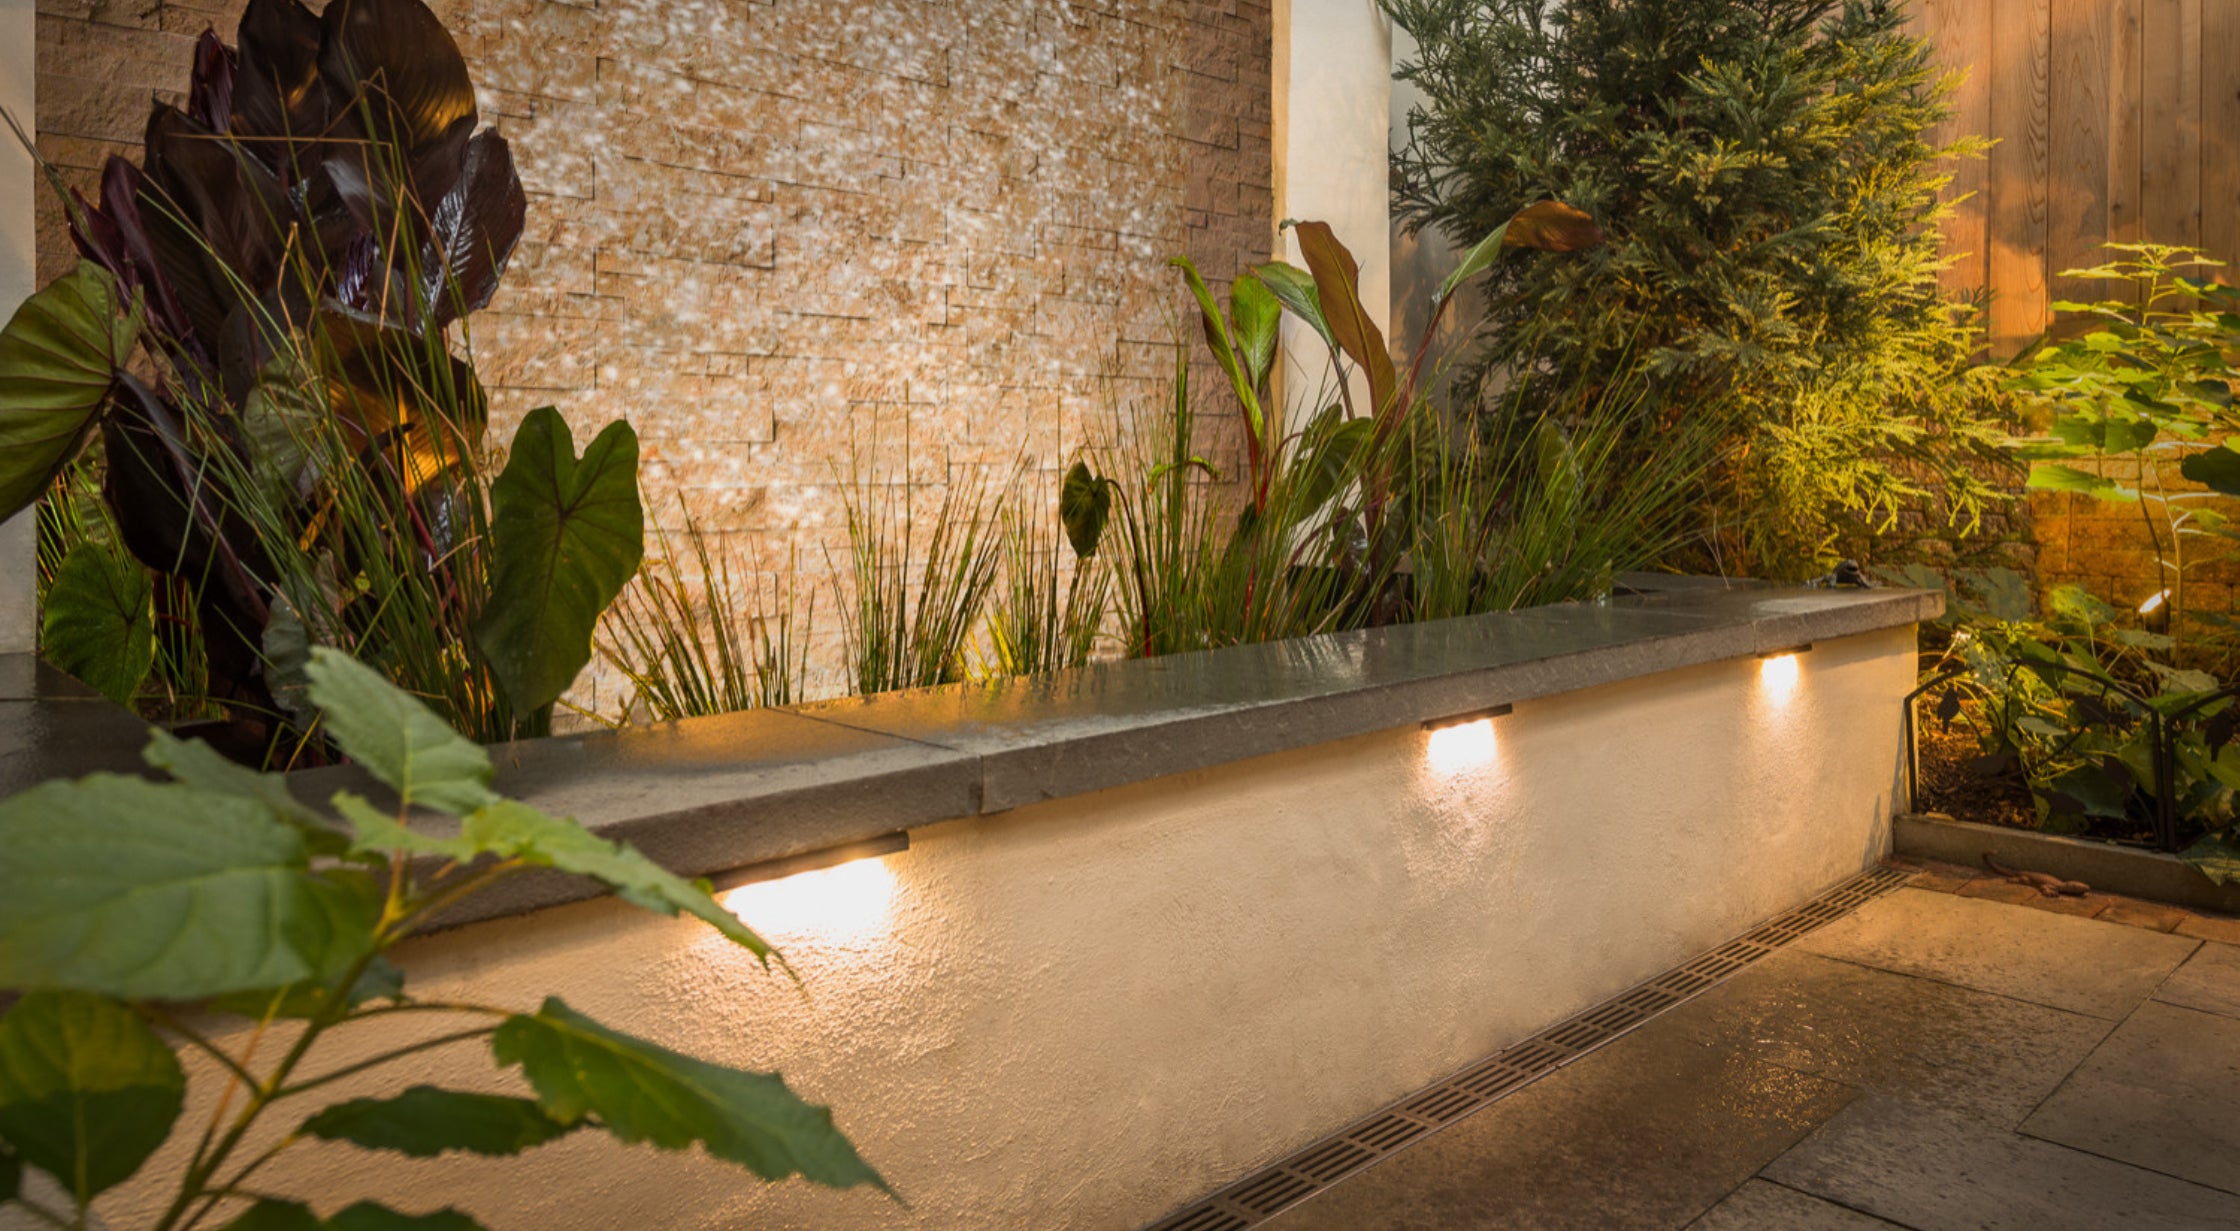
Verstile Design: This hardscape lighting line has an aluminum shell. Measuring 13 inches in length, it is designed to blend beneath your steps, planters, walls or any outdoor downlight. This light was designed to look beautiful during the day and at night. User-friendly stainless steel mounting plates make it easy to install on walls, steps, and ceilings.
ETL Listed: COLOER hardscape light is ETL Listed to guarantee customers' safety. Operating at AC/DC 12V low input voltage, it is safe for children or pets in the area. This hardscape light must be powered by a 12-24V low voltage transformer (transfomer is sold separately).
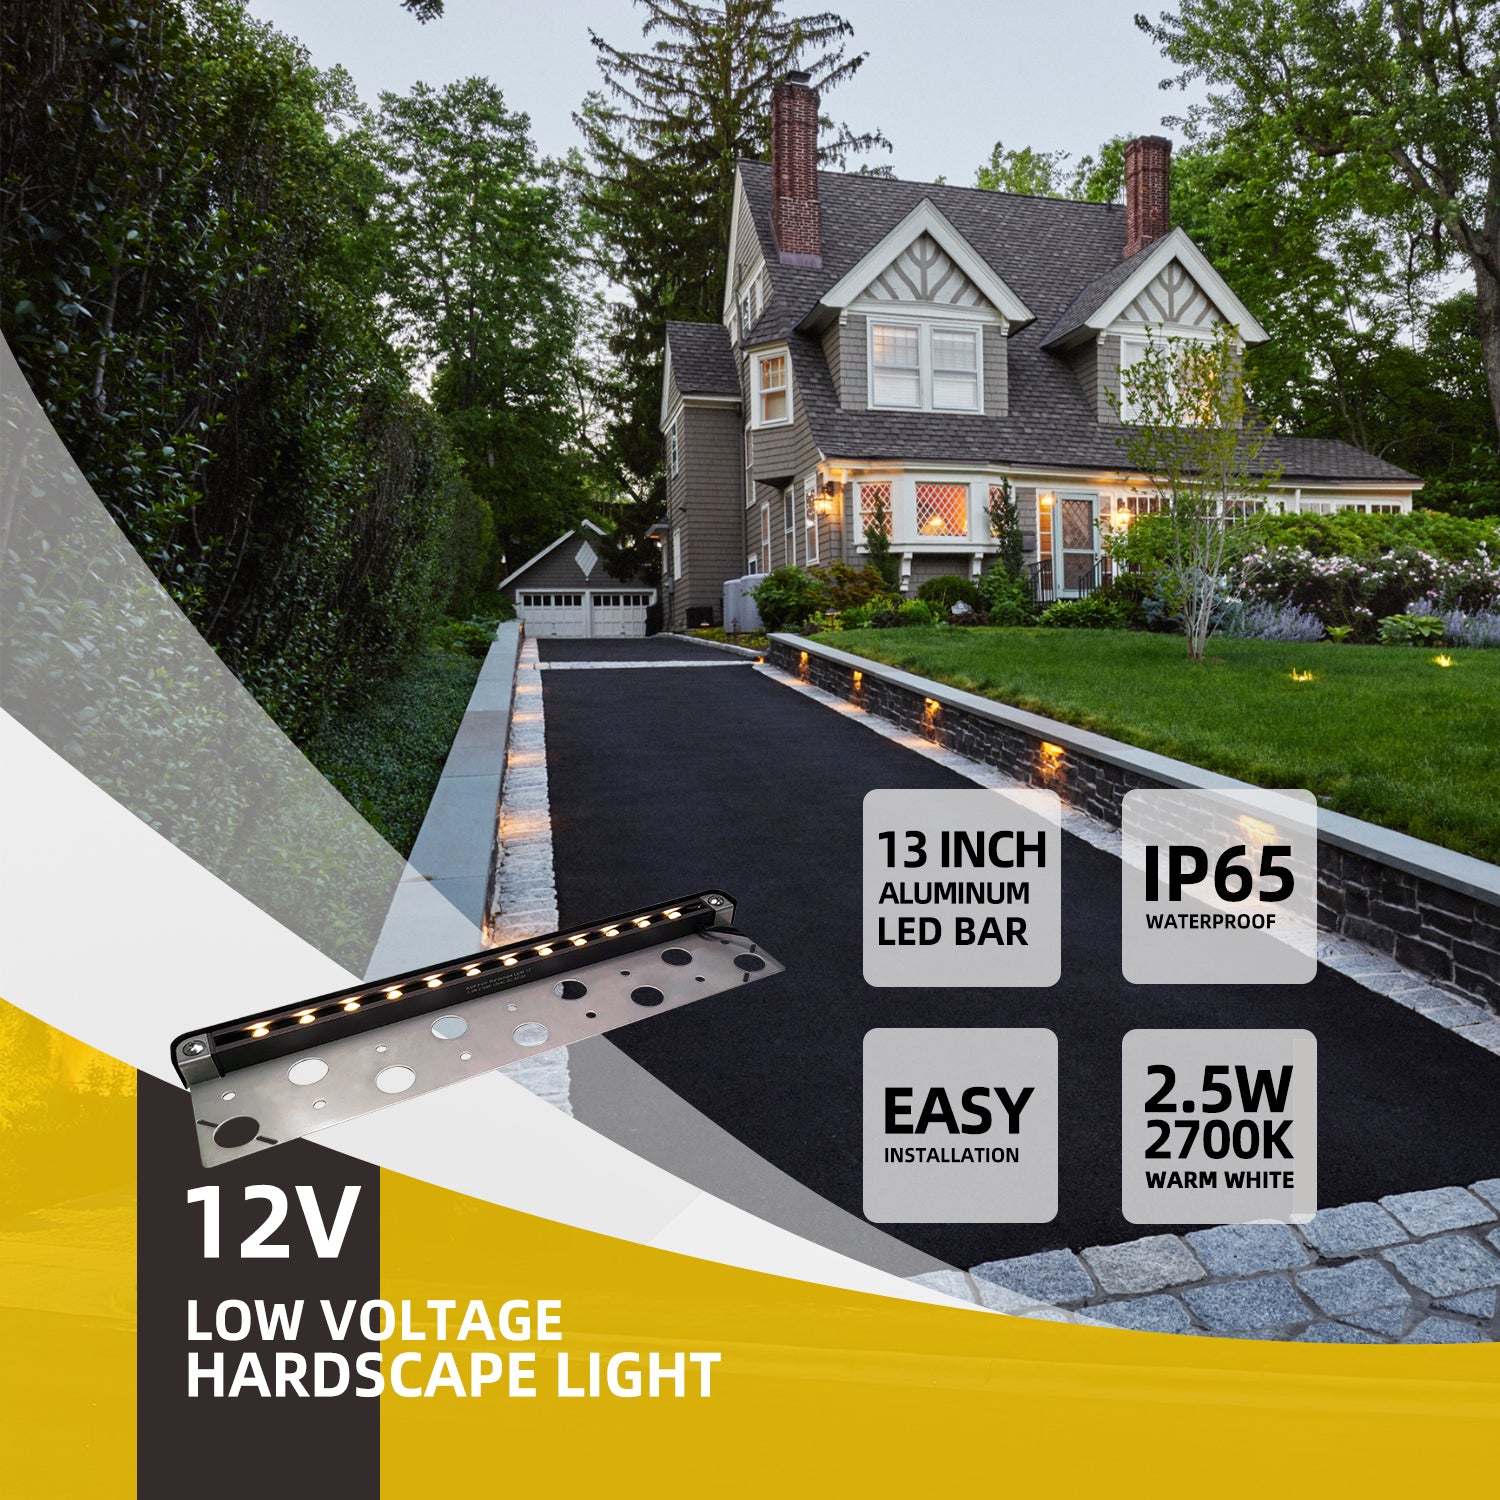
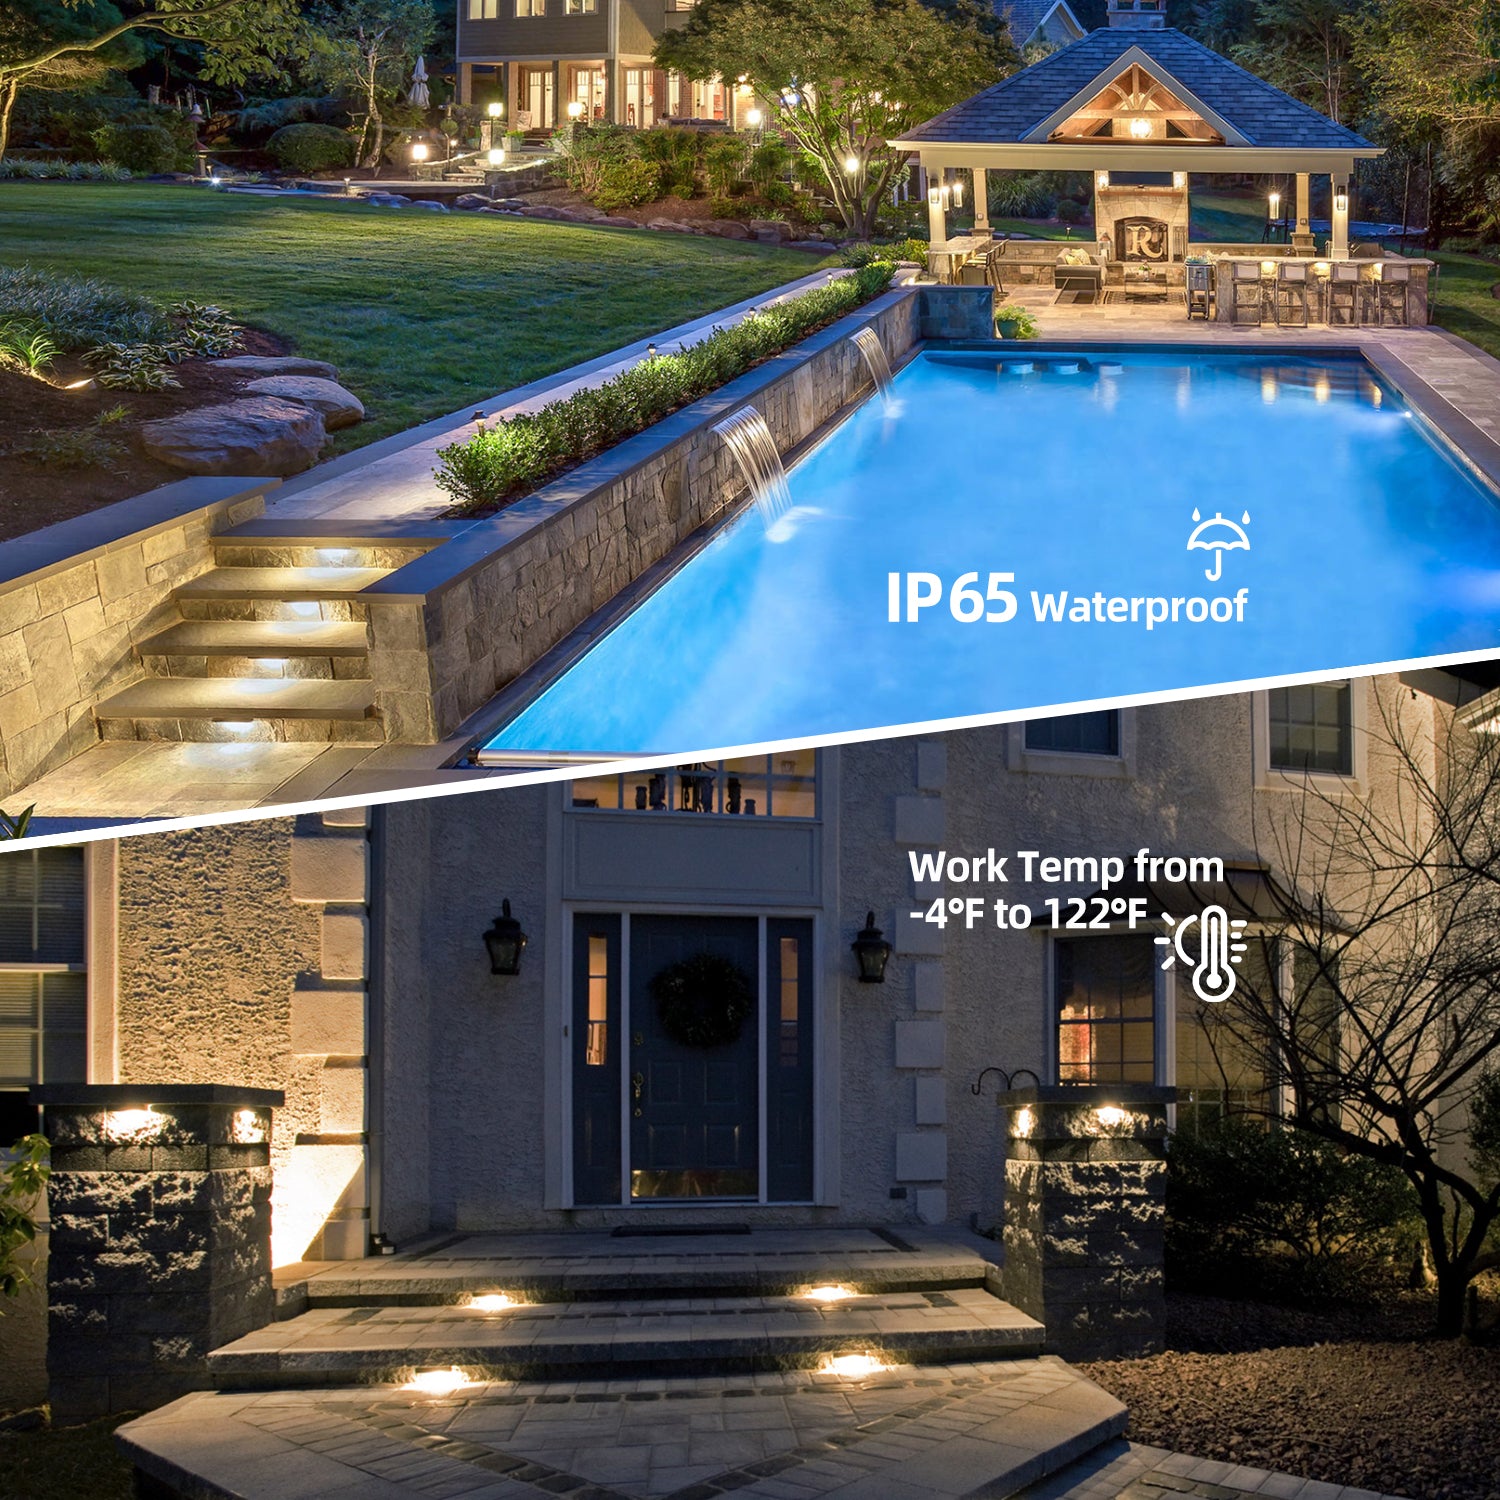
Buil for Outdoors: This LED hardscape light features a working temperature range of -4℉-122℉ and carries an IP65 waterproof rating. It is perfect for use in wet outdoor locations.
Energy Efficient: Emitting 240lm of warm 2700K soft white light, this LED hardscape light only needs 2.5W to match the output of a 10W incandescent light. With a 45⁰ downward beam angle that eliminates glare and a high CRI of 90 that accurately renders the true color of objects.
Lifetime Warranty: Constructed with state-of-the-art components and boasting a 50,000-hour lifespan of the LED chips, we offer a lifetime warranty on the brass light fixture and a 5 year warranty for the LED chips. we firmly stand behind our product with our top-rated customer service. Please contact us if you have any issues.
Specifications
| Material: Die-cast Aluminum | Color: Antique Bronze | Product Dimensions: 13"L x 3.1"W x 0.79"H | Power Source: 9-17V AC/DC |
| Wattage: 2.5 Watts | Maximum Compatible Wattage: 50 Watts | Color Temperature: 2700K | Light Color: Warm White |
| Brightness: 240 Lumen | Color Rendering Index (CRI): >85 | Item Weight: 4.5 Pounds | Lead Wire: 6-Foot 18AWG Premium Copper Wire |
| Warranty Type: Lifetime | Indoor/Outdoor Usage: Outdoor | Style: Model | Finish Type: Polished |
| Installation Type: Flush Mount | Lighting Method: Downlight | Light Source Replaceable: Yes | Shade Material: Aluminum & stainless steel |
| Special Features: Energy Efficient, Cuttable Design | Included Components:Wire Connectors, Mounting Hardware, LED Lens, Instruction Manual |
How to Install
How to Install
Step 1: Turn off the power supply.
Step 2: Determine the desired location for each fixture before the construction of the walls starts. Mark the location of the two screw holes and drill the holes for the plastic anchors with drill bit that is appropriate for the material that you are drilling into the plastic. Place the plastic anchors into the holes.
Step 3: Place the stainless steel mounting bracket and fixture in between layers of hardscape material. Screw the 2 screws into the anchors through the holes in the bracket, securing the fixture.
Step 4: Route the fixture wire through the wall to the main low-voltage supply cable using standard masonry procedures.
Step 5: Connect the fixture to the low-voltage power supply.
How to Choose a Transformer
To determine the size of the transformer needed for a low-voltage lighting system, add up the wattage of all fixtures in the system and add 10% for low-voltage cable and fixture connections.
If the total load of fixtures is too great, either divide the total load between 2 transformers or use a more powerful transformer.
Select a transformer with 20% higher capacity than the total wattage of all fixtures in the system, which allows you to add more fixtures later.
Size of transformer=Total wattages of fixtures X 1.1
Select a transformer that matches as close as possible to the calculation shown above.
Example: you have 12 fixtures, each 5 watt. You need a 75-watt transformer (12x5=60 plus 10%= 66)
NOTE: Low-voltage lighting systems require the use of a transformer to reduce the standard 120-volt power from ordinary household electricity to 12, 13, 14, and 15 volts needed to power low-voltage fixtures.
The total wattage of all fixtures connected to one transformer must not exceed the wattage capacity of the transformer.
Downloads

13-inch Aluminum LED Hardscape Lighting
This hardscape built with aluminum for maximum resistance to the outside elements, equipped with efficient and long-lasting LEDs. The CRI of 90 displays the true color of objects. This hardscape lighting line has an aluminum shell with a 13-inch length and 3 easy-to-install mounting plates for walls, steps, and ceiling installations.
Verstile Design: This hardscape lighting line has an aluminum shell. Measuring 13 inches in length, it is designed to blend beneath your steps, planters, walls or any outdoor downlight. This light was designed to look beautiful during the day and at night. User-friendly stainless steel mounting plates make it easy to install on walls, steps, and ceilings.
ETL Listed: COLOER hardscape light is ETL Listed to guarantee customers' safety. Operating at AC/DC 12V low input voltage, it is safe for children or pets in the area. This hardscape light must be powered by a 12-24V low voltage transformer (transfomer is sold separately).
Buil for Outdoors: This LED hardscape light features a working temperature range of -4℉-122℉ and carries an IP65 waterproof rating. It is perfect for use in wet outdoor locations.
Energy Efficient: Emitting 240lm of warm 2700K soft white light, this LED hardscape light only needs 2.5W to match the output of a 10W incandescent light. With a 45⁰ downward beam angle that eliminates glare and a high CRI of 90 that accurately renders the true color of objects.
Lifetime Warranty: Constructed with state-of-the-art components and boasting a 50,000-hour lifespan of the LED chips, we offer a lifetime warranty on the brass light fixture and a 5 year warranty for the LED chips. we firmly stand behind our product with our top-rated customer service. Please contact us if you have any issues.
| Material: Die-cast Aluminum | Color: Antique Bronze | Product Dimensions: 13"L x 3.1"W x 0.79"H | Power Source: 9-17V AC/DC |
| Wattage: 2.5 Watts | Maximum Compatible Wattage: 50 Watts | Color Temperature: 2700K | Light Color: Warm White |
| Brightness: 240 Lumen | Color Rendering Index (CRI): >85 | Item Weight: 4.5 Pounds | Lead Wire: 6-Foot 18AWG Premium Copper Wire |
| Warranty Type: Lifetime | Indoor/Outdoor Usage: Outdoor | Style: Model | Finish Type: Polished |
| Installation Type: Flush Mount | Lighting Method: Downlight | Light Source Replaceable: Yes | Shade Material: Aluminum & stainless steel |
| Special Features: Energy Efficient, Cuttable Design | Included Components:Wire Connectors, Mounting Hardware, LED Lens, Instruction Manual |
How to Install
Step 1: Turn off the power supply.
Step 2: Determine the desired location for each fixture before the construction of the walls starts. Mark the location of the two screw holes and drill the holes for the plastic anchors with drill bit that is appropriate for the material that you are drilling into the plastic. Place the plastic anchors into the holes.
Step 3: Place the stainless steel mounting bracket and fixture in between layers of hardscape material. Screw the 2 screws into the anchors through the holes in the bracket, securing the fixture.
Step 4: Route the fixture wire through the wall to the main low-voltage supply cable using standard masonry procedures.
Step 5: Connect the fixture to the low-voltage power supply.
How to Choose a Transformer
To determine the size of the transformer needed for a low-voltage lighting system, add up the wattage of all fixtures in the system and add 10% for low-voltage cable and fixture connections.
If the total load of fixtures is too great, either divide the total load between 2 transformers or use a more powerful transformer.
Select a transformer with 20% higher capacity than the total wattage of all fixtures in the system, which allows you to add more fixtures later.
Size of transformer=Total wattages of fixtures X 1.1
Select a transformer that matches as close as possible to the calculation shown above.
Example: you have 12 fixtures, each 5 watt. You need a 75-watt transformer (12x5=60 plus 10%= 66)
NOTE: Low-voltage lighting systems require the use of a transformer to reduce the standard 120-volt power from ordinary household electricity to 12, 13, 14, and 15 volts needed to power low-voltage fixtures.
The total wattage of all fixtures connected to one transformer must not exceed the wattage capacity of the transformer.
13 Inch LED Aluminum Hardscape Lighting
LED 2700K Warm White
13" Aluminum Fixture
Cuttable Design
What included in the box
- Main Fixture
- Wire Connectors
- User Manual
How long can I receive it
- We have CA/FL two warehouses for service
- We will arrange delivery nearby
- You will receive the goods in 3-5 work days
- Remote areas may take a little longer
How long is the warranty
- Brass Fixture: Lifetime
- Aluminum Fixture: 5 Years
- LED Bulbs: 5 Years
- Transformers: Lifetime
12V LOW VOLTAGE
2700K Warm White
Build with aluminum for maximum resistance to the outside elements, equipped with efficient and long-lasting LEDs. Emitting 110lm of 2700K soft white light. The CRI of 90 displays the true color of objects. This hardscape lighting line has a aluminum shell with 13 inch length to blend under your steps, planters, walls or any outdoor downlight. This light was designed to look beautiful day and night, including 3 easy to install mounting plates for walls, steps, and ceiling installations.
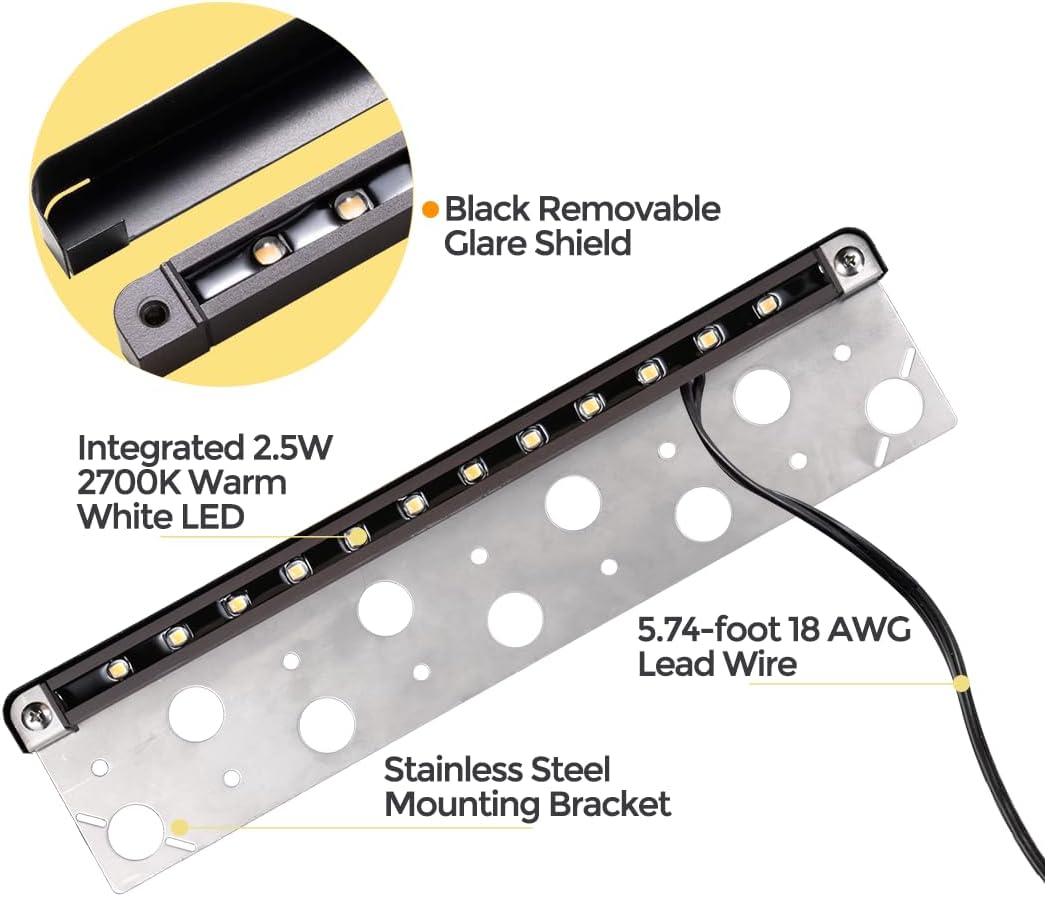
Uniform Finish
The aluminum shell LED bar and stainless steel bracket provides excellent heat dissipation, corrosion resistance and rust resistance
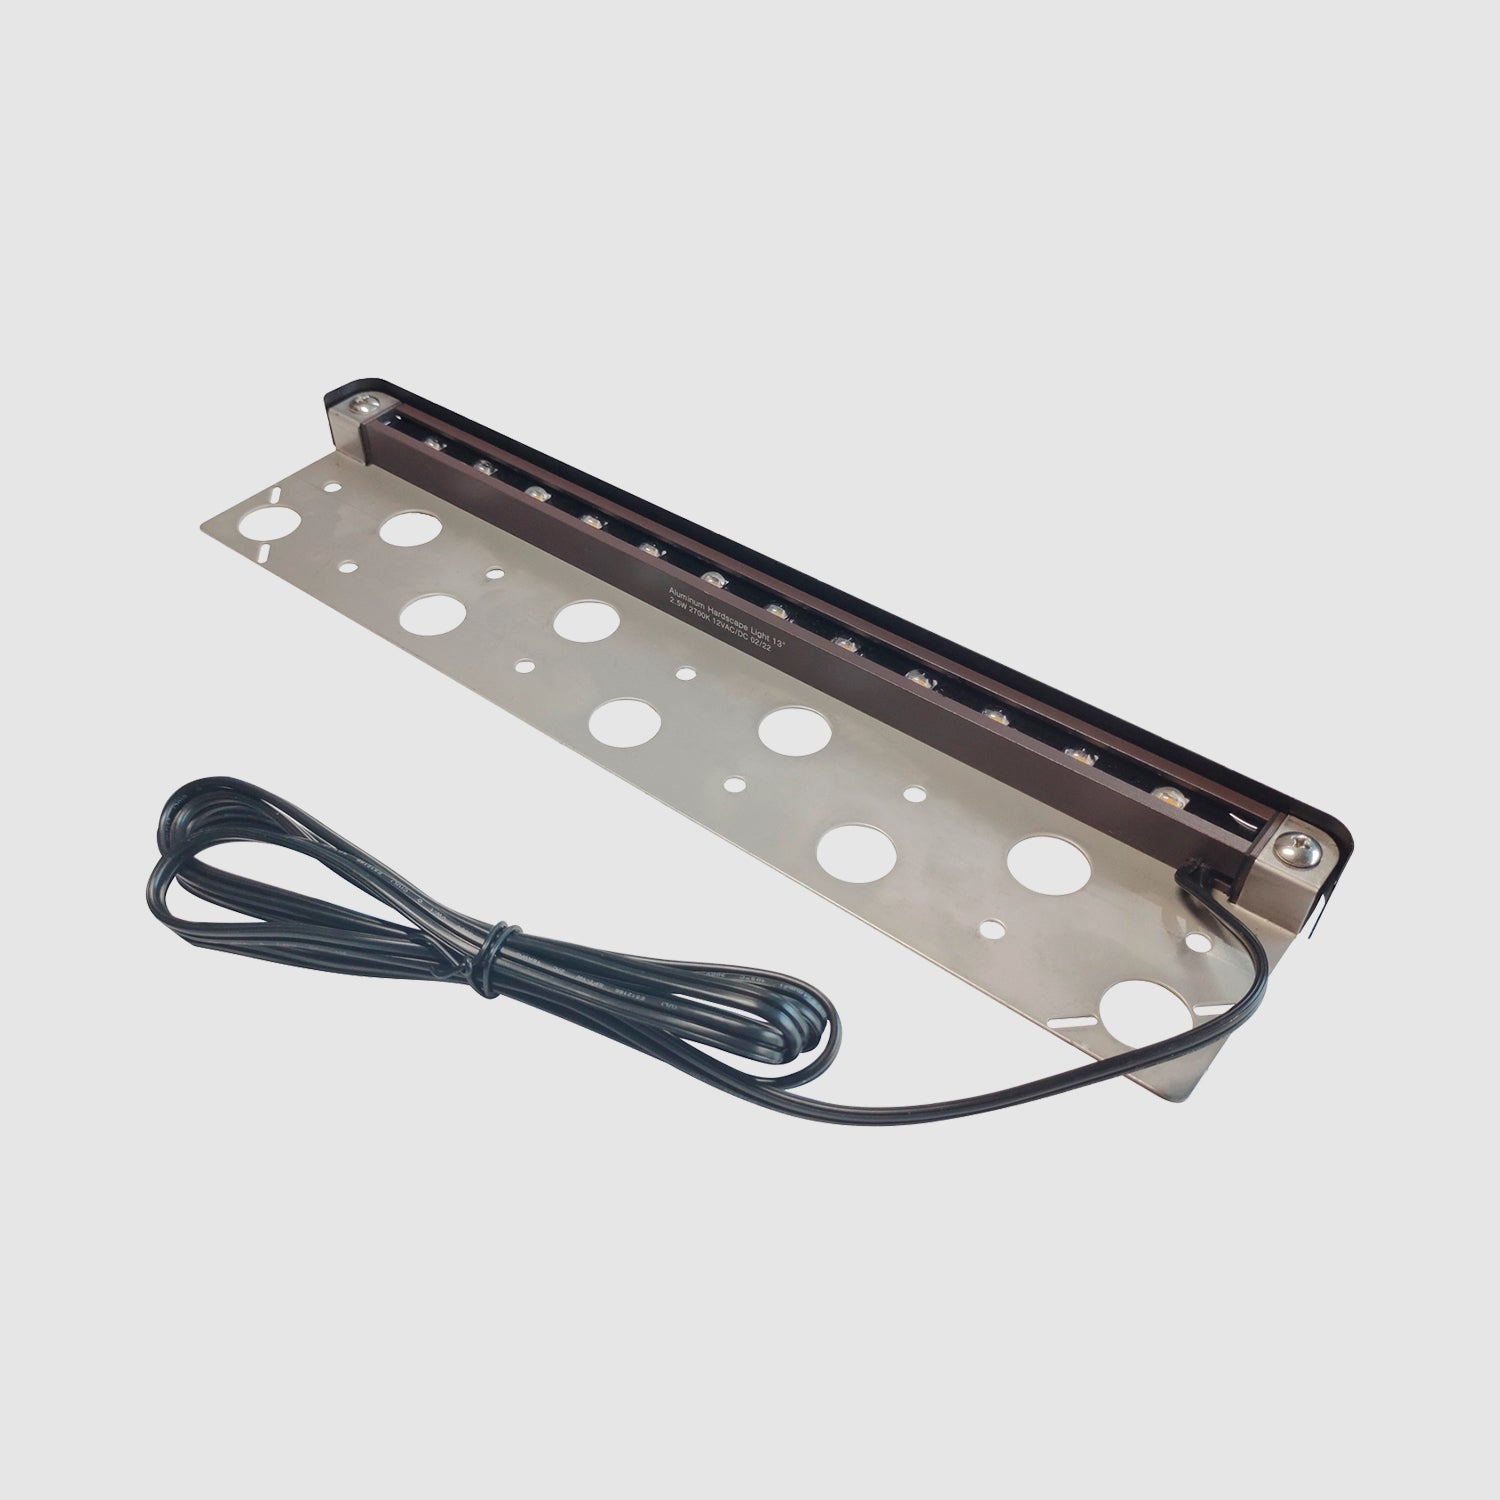
5.74-foot 18 AWG
Includes a 5.74-foot 18 AWG lead wire aimed at diminishing corrosion and enhancing the fixture's overall lifespan
2.5 Watts and 240 Lumens
This step light is 2.5 watts and 240 lumens, providing a soft and bright lighting effect while being even more energy-efficient

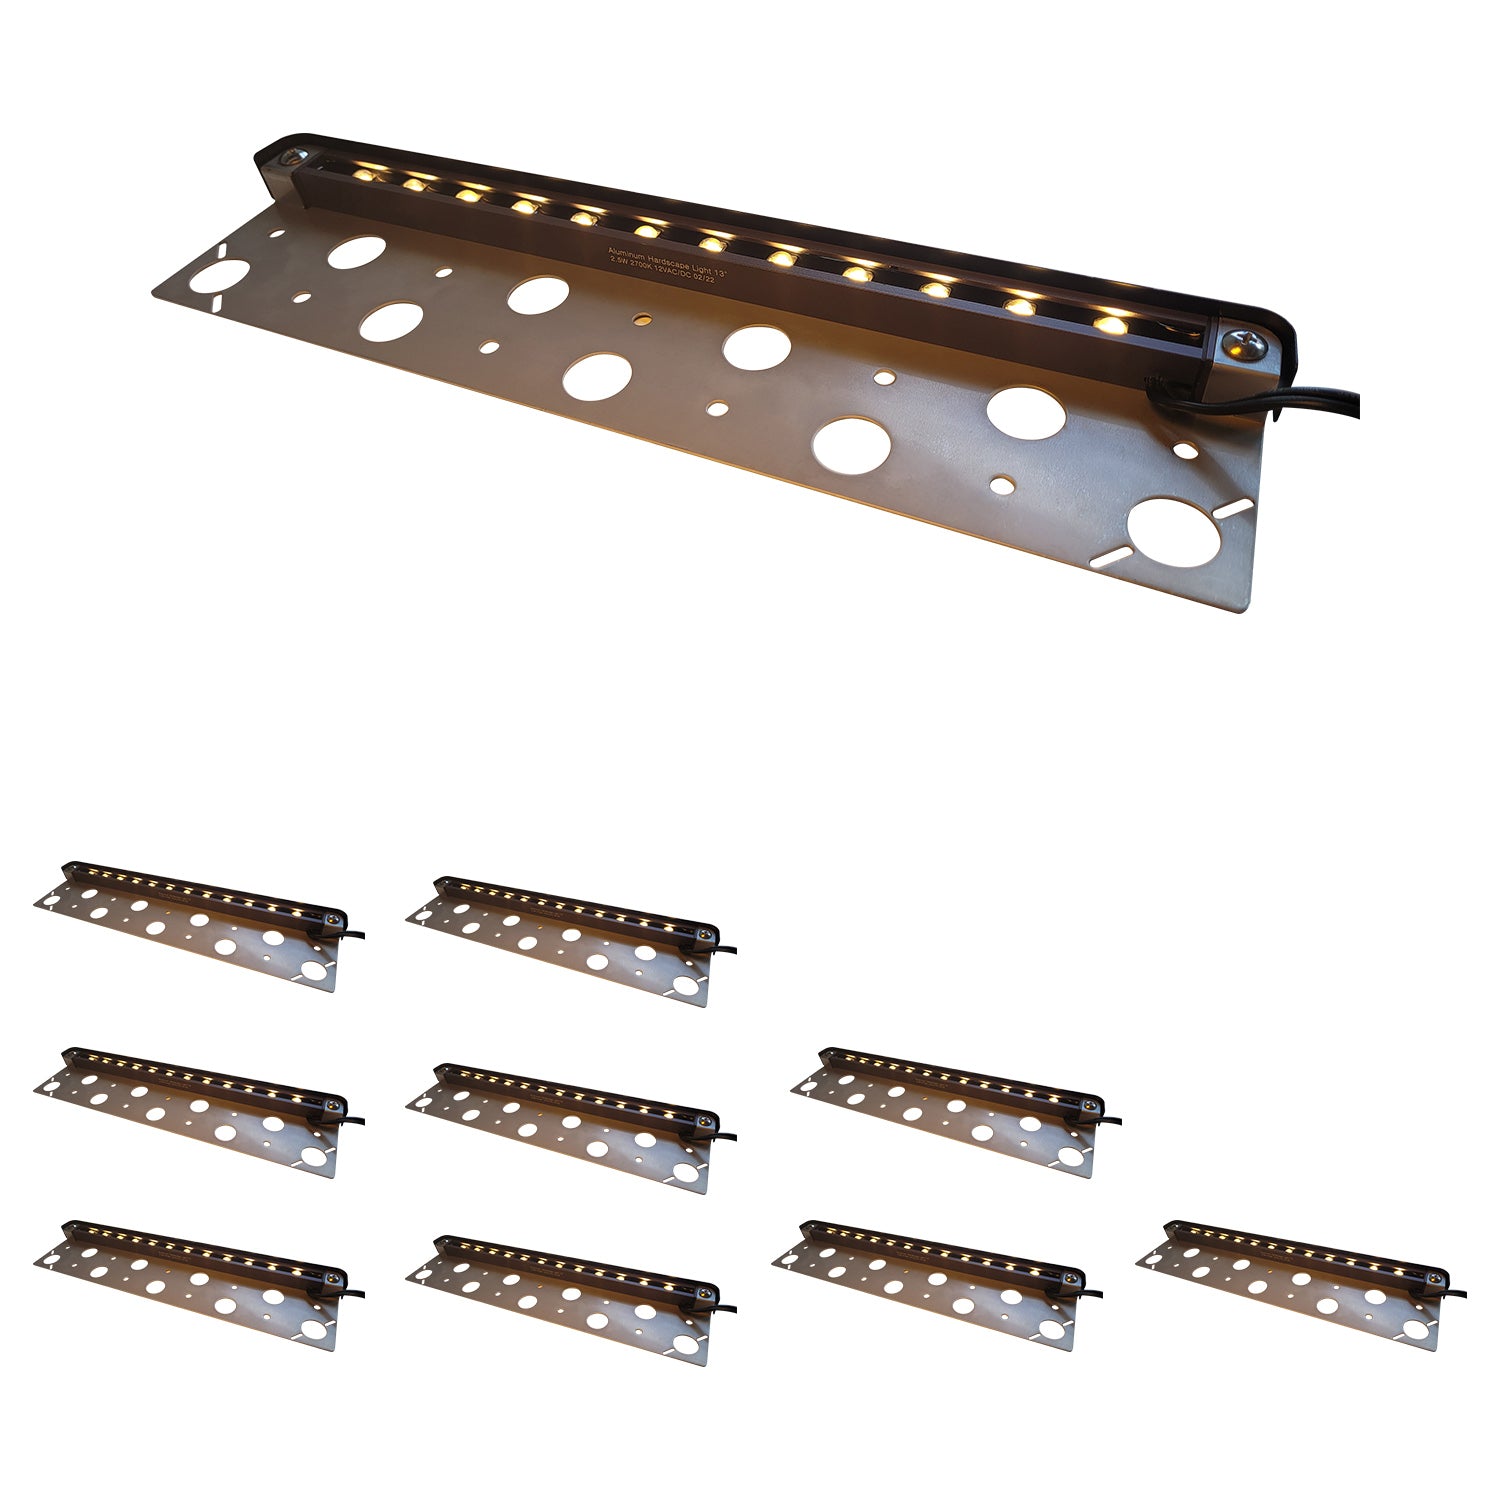
Cuttable Design
The cuttable design of this hardscape light allows you to adjust its width according to your needs by simply cutting along the dotted line
Hardscape Light Series
- High-salt, moisture, and UV resist, uniform, and long-lasting finish fixture, the fine workmanship makes it tougher, harder, and aesthetically pleasing.
- With 5.74-foot 18 AWG lead wire, suitable for variety of installation requirements.
- Emitting 240lm of 2700K soft white light, this LED hardscape light only needs 2.5W to match the output of a 10W incandescent light. The 45⁰ downward beam angle eliminates glare.
- Easy installation, just set the fixture in the slot, Stick your screws in the anchors, then begin screwing them down.
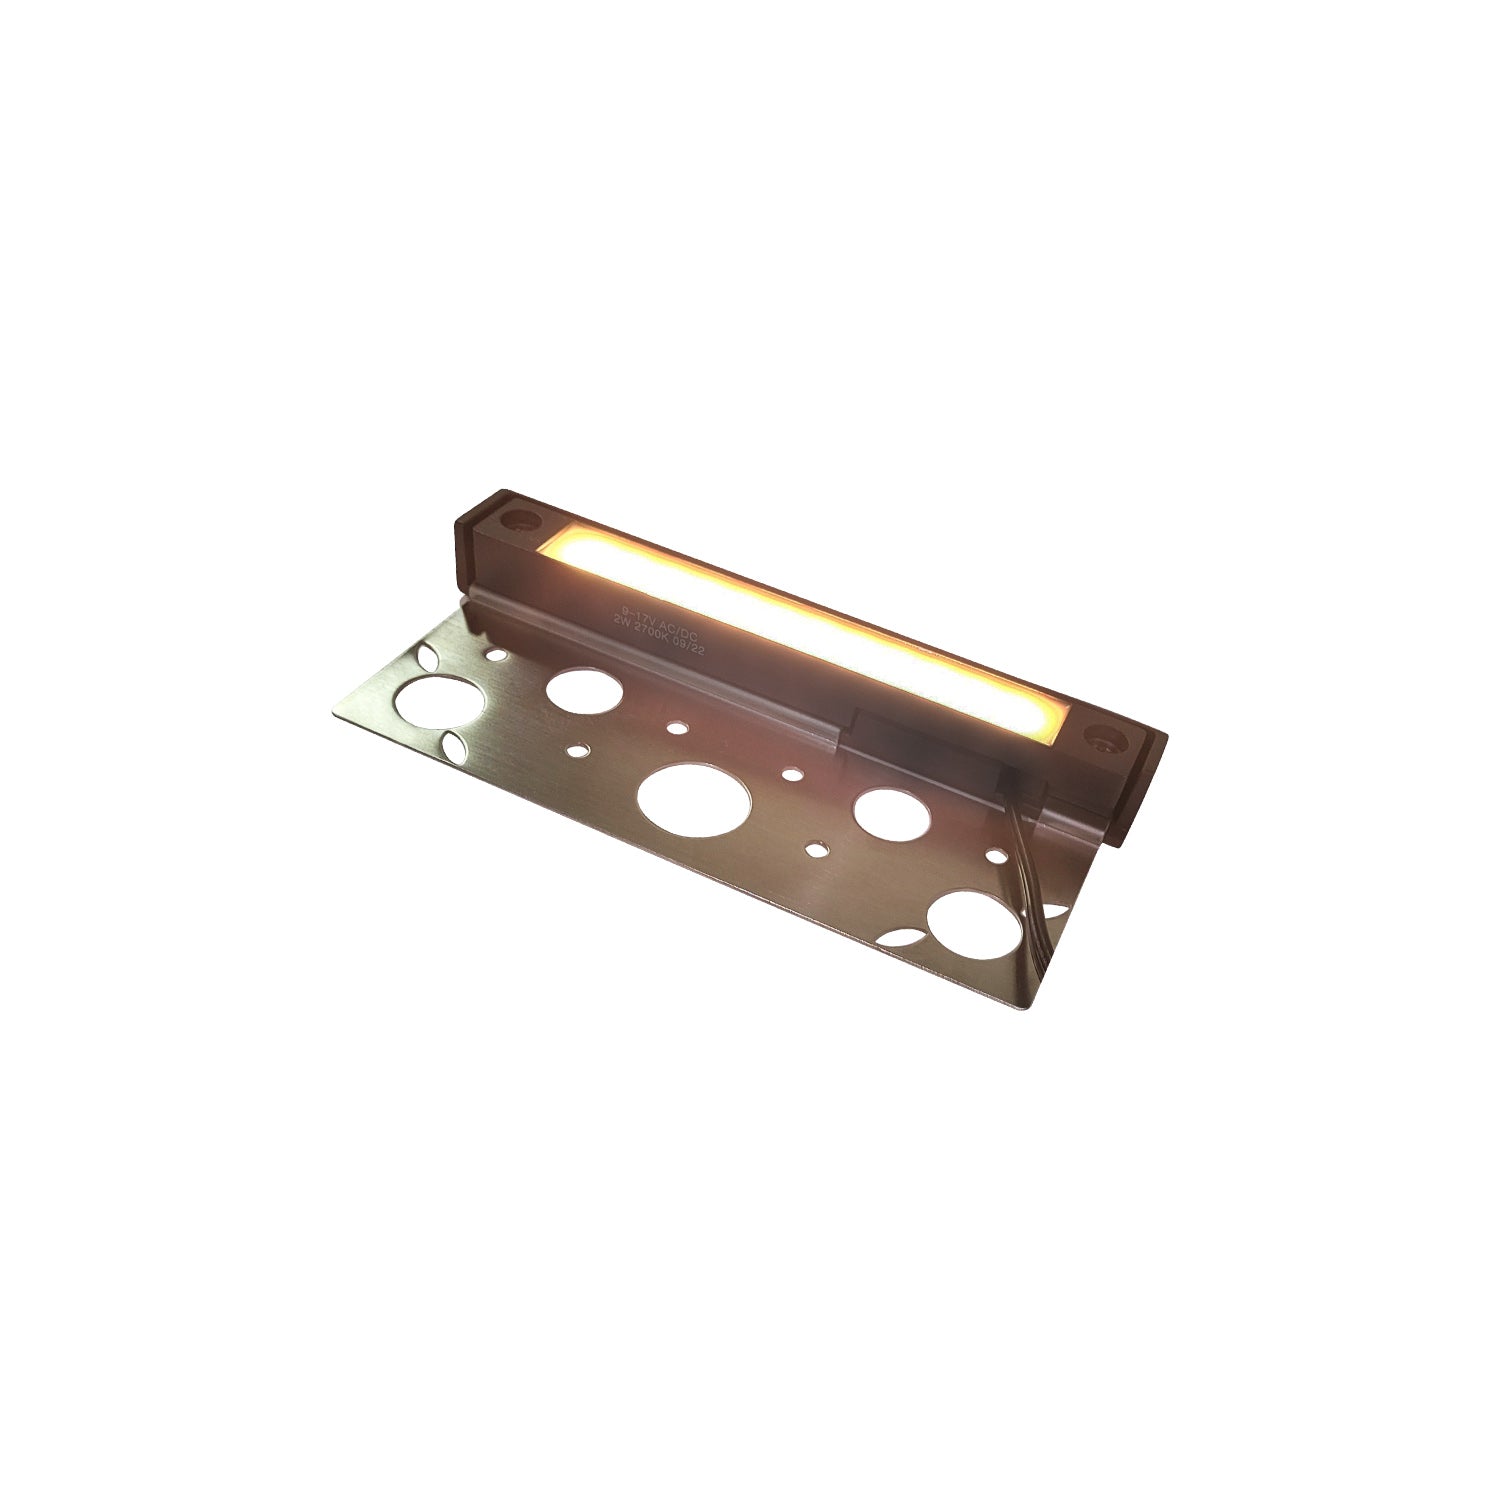
13 x 3.1 x 0.79 inches
7 x 3 x 1 inches
2.2 Pounds
0.9 Pounds
Aluminum
Aluminum
2.5W/2700K/240LM
2.5W / 2700K / 240LM
9-17V AC/DC
9-17V AC/DC
Bronze
Bronze
COLOER 13 inch Aluminum LED Hardscape Lighting
This hardscape light features an aluminum shell and a stainless steel bracket, designed with a 13-inch length to seamlessly integrate with your steps, planters, walls, or any outdoor downlight requirements. IP65 hardscape light 240LM 2700K warm white operational capacity spans from -4℉ to 122℉.
This product is rated 4.9 of 5.0 stars.
It has received 55 reviews.
Still have questions?
We are here to help
COLOER is a manufacturer-direct company based in the United States, dedicated to offering high-quality, affordable products. With a foundation of 10 years of industry experience, we are committed to providing top-notch service through direct sales.
We guarantee local shipment for all products, with delivery as fast as 2 working days after ordering. Therefore, by choosing COLOER, you can expect competitive pricing, quality assurance, efficient delivery, and attentive after-sales service.
For bulk orders or any other product inquiries, please feel free to contact us via phone or email. We are wholeheartedly committed to providing you with consultation and support.
Call: 626-699-4666
Email: customerservice@coloer.com
Business Hours: Monday to Friday 9:00 AM – 5:00 PM CST
Q & A
Will you be getting more of the cct sets? and if so, how soon?
We have sent more 3 cct sets to FBA, they will arrive on April 03. You can make an FBM order, which we will send from our CA warehouse with UPS, can be delivered within 6 days to most parts of the US.
Can you change the color of each light separately? And do they come with extensions to get back to the transformer?
yes, the RGB hardscape lighting can change color on each light separately if they are not in the same group. It needs to supply power by low voltage transformer buy separately, they don't come with transformer, thank you.
Can these be hardwired?
This RGB hardscape light only connects with Bluetooth and uses APP to control it.
Can these lights be turned off and on with a switch or only with your phone? And how do you change the brightness/color?
3 cct hardscape lighting can't connect by phone, there is a button to change the brightness. you need to choose the right brightness first, and then install it.
ls the transformer included?
No, the transformer is not included. The lights are easy to install and control with the app. They work fantastic so far.
Could these lights be powered by a doorbell supply voltage?
This hardscape light works with 12V AC/DC, if your doorbell supply voltage is 8-15V, it can power this light. Because the power supply of the doorbell is relatively small, don't connect more than 4 lights.
Any question?
You can contact us through our contact page! We will be happy to assist you.
COLOER is a manufacturer-direct company based in the United States, dedicated to offering high-quality, affordable products. With a foundation of 10 years of industry experience, we are committed to providing top-notch service through direct sales.
We guarantee local shipment for all products, with delivery as fast as 2 working days after ordering. Therefore, by choosing COLOER, you can expect competitive pricing, quality assurance, efficient delivery, and attentive after-sales service.
For bulk orders or any other product inquiries, please feel free to contact us via phone or email. We are wholeheartedly committed to providing you with consultation and support.
Call: 626-699-4666
Email: customerservice@coloer.com
Business Hours: Monday to Friday 9:00 AM – 5:00 PM CST
Will you be getting more of the cct sets? and if so, how soon?
We have sent more 3 cct sets to FBA, they will arrive on April 03. You can make an FBM order, which we will send from our CA warehouse with UPS, can be delivered within 6 days to most parts of the US.
Can you change the color of each light separately? And do they come with extensions to get back to the transformer?
yes, the RGB hardscape lighting can change color on each light separately if they are not in the same group. It needs to supply power by low voltage transformer buy separately, they don't come with transformer, thank you.
Can these be hardwired?
This RGB hardscape light only connects with Bluetooth and uses APP to control it.
Can these lights be turned off and on with a switch or only with your phone? And how do you change the brightness/color?
3 cct hardscape lighting can't connect by phone, there is a button to change the brightness. you need to choose the right brightness first, and then install it.
ls the transformer included?
No, the transformer is not included. The lights are easy to install and control with the app. They work fantastic so far.
Could these lights be powered by a doorbell supply voltage?
This hardscape light works with 12V AC/DC, if your doorbell supply voltage is 8-15V, it can power this light. Because the power supply of the doorbell is relatively small, don't connect more than 4 lights.
Any question?
You can contact us through our contact page! We will be happy to assist you.